
Introduction
Deep Media Analytics (DMA) are a part of the Deep.BI platform. They allow the system to track users’ interactions with web content using JavaScript snippets or REST API.
Deep Media Analytics support:
- web events,
- mobile events,
- HTML native video players,
- HTML native audio players,
- any other data sent via REST API in JSON format.
Media companies can start analyzing their data just after installing the DMA scripts on their websites (usually via CMS) and setting up a few variables. Alternatively, they can use REST API.
The goal of this document is to assist the developer responsible for the integration of Deep.BI. This document describes the integration with JavaScript, but integration can be done with REST API as well.
The DMA JavaScript code is fully asynchronous in order to not slow down the publisher’s site. Once loaded, DMA code works like most other analytics services — it triggers the loading of a beacon image, which returns a 1x1 pixel image.
Implementation Guide
This guide covers all steps that you need to take in order to fully integrate the Deep Media Analytics script with your website.
1. Integrate DMA snippet
This part shouldn’t take more than 5 to 15 minutes of your time. To implement the main DMA snippet follow our Quick Start Guide.
2. Prepare Implementation Plan
Before you proceed with integrating custom data we recommend preparing an "Implementation Plan" based on this template: Implementation Plan Template.
Make yourself a copy of that file and list all the custom events and attributes you would like to collect before you proceed with integration of custom data. If you have any questions during this part do not hesitate to contact our Support Team.
3. Custom Attributes Integration
Integrate custom attributes from your Implementation Plan.
Resources:
- Integrating custom attributes (documentation)
- Examples of custom attributes integration
- Automatically collected attributes
4. Custom Events Integration
Integrate custom events from your Implementation Plan.
Resources:
Quick Start Guide
Implementation
To implement the DMA tracking script, past this code into the
headsection
<script type="text/javascript">
    /* Deep Tracker (c) v3.0.16 */
    "use strict";!function(){for(var t,e;!(t=window.document.getElementsByTagName("head")[0]);)window.document.getElementsByTagName("html")[0].appendChild(window.document.createElement("head"));"function"!=typeof window.document.querySelectorAll&&((e=window.document.createElement("script")).type="text/javascript",e.charset="utf-8",e.setAttribute("crossorigin","anonymous"),e.async=!0,e.src=(window.document.location.protocol||"http:")+"//api.deep.bi/v3/sizzle.js",t.appendChild(e)),(e=window.document.createElement("script")).type="text/javascript",e.charset="utf-8",e.setAttribute("crossorigin","anonymous"),e.async=!0,e.src=(window.document.location.protocol||"http:")+"//api.deep.bi/v3/init.js",t.appendChild(e)}();
</script>
Installing DMA JavaScript code should be as easy as pasting this snippet inside the <head> tag, preferably right after opening it.
Once this script is implemented globally across your site, you might need to make a few configuration tweaks to better fit your site. All of these options are outlined in the rest of this guide.
Authorization
For simplicity in further examples, we will set a global variable
deep(window.deep) with the initialized tracker. In further examples we will refer to this global variable. However, setting the global variable in this way is not required. And follow with this configuration block:
<script type="text/javascript">
    var deepInitializerListenerId = setInterval(function () {
        if (window.hasOwnProperty("deepTracker") && window.deepTracker && window.deepTracker.isInitialized()) {
            clearInterval(deepInitializerListenerId);
            window.deep = window.deepTracker.track("DATASET_KEY", "INGESTION_KEY");
            window.deep.options.trackconsent = _USER_GDPR_RESPONSE_;
            window.deep.options.media = true;

            window.deep();
        }
    });
</script>
To send data, you need to obtain two authorization keys:
- DATASET_KEY
- INGESTION_KEY
You can set a global variable containing your authorization keys, or send them every time you send data.
For the first option, put an authorization snippet below the main loading script.
If you already have a Deep.BI account, please visit the API Keys tab in Settings where DATASET_KEY is under the "Stream Key" name and INGESTION_KEY is referred to as "Ingestion API Personal Key". The API Keys tab is accessible only by admin users. If you have any questions or need help, please contact us at Support Team.
Sending Data
Send data by referring to the global tracker variable:
<script type="text/javascript">deep();</script>
Alternatively, authorize and send data without setting the global variable:
<script type="text/javascript">
DeepTrack.track("DATASET_KEY", "INGESTION_KEY")();
</script>
To start collecting data, put the following script somewhere it can be launched, specified below.
In most cases it can be anywhere in the <body> section of a page. The script will gather automatically pre-defined types of events - see the Events section for more details.
If you’d like to collect custom events with your own parameters, you should add custom lines of the script in any places where these events occur. For more details see our Advanced Integration Guide.
Testing Integration
In order to make sure you have completed these steps successfully, you should test your integration. To do that, you can use the developer tools in your web browser. See below for a short description on how to do this in the most popular browsers. The process is very similar for most of them.
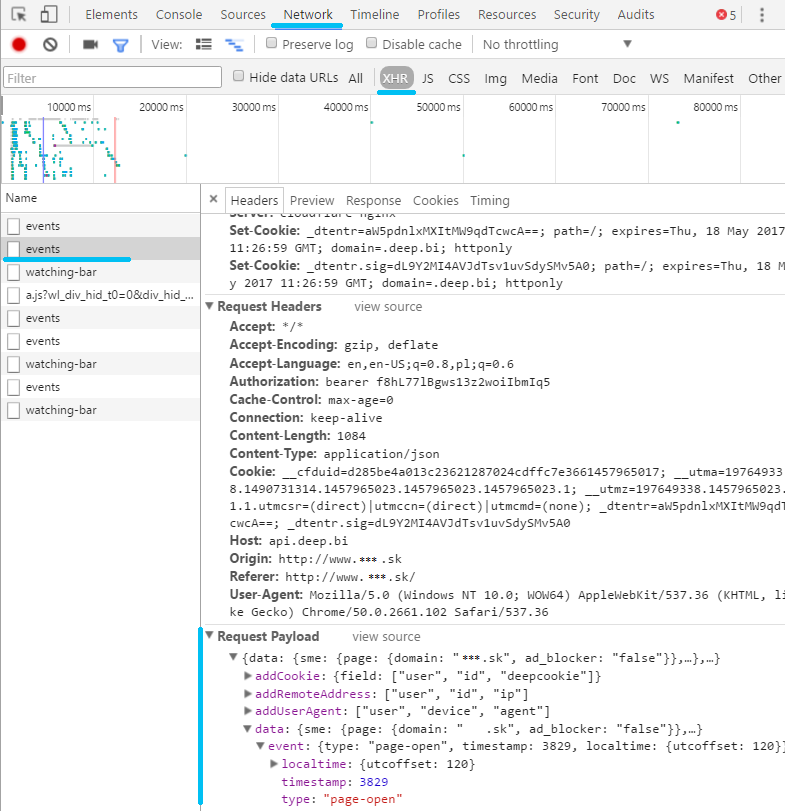
Chrome, Opera
Open Developer Tools in your browser.
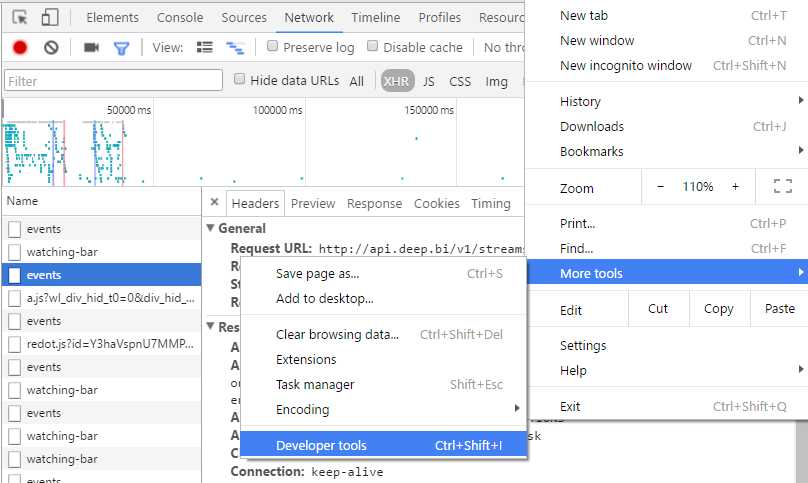
Go to the Network tab and select XHR on the filter tab.
Click on the request named events.
In Headers your Request URL should look like this:
http://api.deep.bi/v1/streams/<YOUR_DATASET_KEY>/events, where<YOUR_DATASET_KEY>is replaced by your actual key. Your status code should be 204.Scroll down to Request Payloads and expand specific event attributes. Check their values to confirm your integration.
Firefox
- Go to Menu -> Developer -> Network.
- On the bottom of the Developer Console you should see a bar with filters, click XHR.
- Choose the events request on the list.
- On your right, another window should appear. Go to the Params tab to see all the data that is sent from your website to Deep.BI.
Edge
- Open Developer Tools (F12).
- Go to the Network tab.
- Filter out XHR elements.
- Choose the events request on the list.
- In the window on the right, choose the content (second) tab and then choose "request content" to see the data sent to Deep.BI in a json.
Events
Various events are sent when handling media that are embedded in HTML documents using the <audio> and <video> elements; this section lists them and provides some helpful information about using them. Moreover, DMA automatically collects web events like opening a page, the page's load time, whether or not a page bounces, etc.
Website Events
| Event Type | Description |
|---|---|
| page-open | User opened a page |
| page-ping | A Page-ping event is sent after every 15 seconds of user activity. Each event in a user's session has its number in sequence, starting from 1 (dimension: pingSeq). That means that DMA customers can easily and flexibly define custom events like a Page View of 30s+ with pingSeq = 2. |
Media Events (Audio & Video)
Media companies can use the HTML <video> element to embed video content in a document. The video element may contain one or more video sources. To specify a video source, use either the src attribute or the <source> element; the browser will choose the most suitable option.
The HTML <audio> element is used to embed sound content in documents. It may contain one or more audio sources, represented using the src attribute or the <source> element; the browser will choose the most suitable option.
To enable collecting media events, specify:
deep.options.media = true
One may control which media are tracked specifying the css selector of the desired HTML video or audio tags.
To watch only
<video class="ad-one" >tags, specify:
deep.options.media = "video.ad-one"
If multiple selectors are possible:
deep.options.media = ["video", "audio#my_audio"]
Furthermore it's possible to specify which events are tracked for specified selectors.
To collect the default events for the
<video>tags and only the specified events:playing,pauseandprogressfor<video id="my_audio" >tag, specify:
deep.options.media = [
  "video",
  {
    select: "audio#my_audio",
    events: "playing pause progress"
  }]
Below you’ll see the list of events that are gathered automatically by the DMA script if media tracking is enabled. You will see in your data an “audio” or “video” prefix accordingly, depending on the media event type referenced.
For example, instead of [media]-play, we will capture an audio-play or a video-play event.
| Event Type | Description |
|---|---|
| [media]-abort | Sent when playback is aborted; for example, if the media is playing and is restarted from the beginning, this event is sent. |
| [media]-ended | Sent when playback completes. |
| [media]-error | Sent when an error occurs. The element's error attribute contains more information. See Error handling for details. |
| [media]-playing | Sent when the media begins to play (either for the first time, after having been paused, or after ending and then restarting). |
| [media]-pause | Sent when playback is paused. |
| [media]-seeked | Sent when a seek operation completes. |
| [media]-waiting | Sent when the requested operation (such as playback) is delayed pending the completion of another operation (such as a seek). |
Below are events that may also be captured by specifying them explicitly:
To select which events are captured, specify:
deep.options.media = {
  events: "playing error pause progress volumechange"}
To select which events are captured by selected tags, specify:
deep.options.media = {
  select: "video.media-to-track",
  events: "playing error pause progress volumechange"}
Be careful though! Enabling some of the events below may generate a lot of tracking traffic, mainly: progress, seeking, suspend or stalled.
| Event Type | Description |
|---|---|
| [media]-canplay | Sent when enough data is available that the media can be played, at least for a couple of frames. This corresponds to the HAVE_ENOUGH_DATA readyState. |
| [media]-canplaythrough | Sent when the ready state changes to CAN_PLAY_THROUGH, indicating that the entire piece of media can be played without interruption, assuming the download rate remains at least at the current level. Note: Manually setting thecurrentTime will eventually fire a canplaythrough event in Firefox. Other browsers might not fire this event. |
| [media]-durationchange | The metadata has loaded or changed, indicating a change in duration of the media. This is sent, for example, when the media has loaded enough that the duration is known. |
| [media]-emptied | The media has become empty; for example, this event is sent if the media has already been loaded (or partially loaded), and the load() method is called to reload it. |
| [media]-encrypted | The user agent has encountered initialization data in the media data. |
| [media]-interruptbegin | Sent when audio playing on a Firefox OS device is interrupted, either because the app playing the audio is sent to the background, or audio in a higher priority audio channel has begun to play. See Using the AudioChannels API for more details. |
| [media]-interruptend | Sent when some previously interrupted audio on a Firefox OS device commences playing again — when the interruption ends. This is when the associated app comes back to the foreground, or when the higher priority audio has finished playing. See Using the AudioChannels API for more details. |
| [media]-loadeddata | The first frame of the media has finished loading. |
| [media]-loadedmetadata | The media's metadata has finished loading; all attributes now contain as much useful information as they're going to. |
| [media]-loadstart | Sent when loading of media begins. |
| [media]-mozaudioavailable | Sent when an audio buffer is provided to the audio layer for processing; the buffer contains raw audio samples that may or may not already have been played by the time you receive the event. |
| [media]-play | Sent when playback of the media starts after having been paused; that is, when playback is resumed after a prior pause event. |
| [media]-progress | Sent periodically to inform interested parties of progress downloading the media. Information about the current amount of the media that has been downloaded is available in the media element's buffered attribute. |
| [media]-ratechange | Sent when the playback speed changes. |
| [media]-seeking | Sent when a seek operation begins. |
| [media]-stalled | Sent when the user agent is trying to fetch media data, but data is unexpectedly not forthcoming. |
| [media]-suspend | Sent when loading of the media is suspended; this may happen either because the download has completed or because it has been paused for any other reason. |
| [media]-timeupdate | The time indicated by the element's currentTime attribute has changed. |
| [media]-volumechange | Sent when the audio volume changes (both when the volume is set and when the muted attribute is changed). |
Performance Events
This section describes events that measure the load time of page resources such as: images, css style sheets or external scripts.
To track the load time of resources, specify:
deep.options.performance = true
To measure only scripts and images:
deep.options.performance = ["script", "img"]
To measure only stylesheets by selecting all files that ends with
.css:
deep.options.performance = /.*\.css$/;
If you want to control which resources are being measured, you may specify them with string or regular expression patterns.
Performance event types
| Event Type | Description |
|---|---|
| resource-performance | The measure of the resource loading time |
Performance event attributes
| Variable name | Description |
|---|---|
| resource.name | Resource URL |
| resource.type | The element name that initiated resource loading. E.g.: link, script, img, css or xmlhttprequest |
| resource.starttime | A timestamp in milliseconds immediately before the browser starts to fetch the resource, relative to when page loading begins. |
| resource.duration | Duration (in milliseconds) of the performance event. |
| resource.endtime | startTime + duration. A timestamp relative to when page loading begins. |
Error Events
Implementation
To implement a DMA tracking script, include the special version of the initial code into the <head> section of your page.
The special
headsnippet with error tracking enabled:
<script type="text/javascript">
/* Deep Media Analytics (c) 2018-05-30 v2.2.5 */
!function(){function a(a,b){"function"!=typeof h[a]&&(h[a]=b)}function b(a,b,c,d,e){var f=function(f){k&&"object"==typeof f&&null!==f&&k(f);var g=c.push(f),h=j[d];if(h)for(var i=0;i<h.length;++i)h[i](b,f,a[5],g);return e};return e||(e=f),f}function c(a){var b,c=d[l]("script");for(c.type="text/javascript",c.async=!0,c.src="http"+("https:"===d.location.protocol?"s:":":")+a;!(b=d[m](o)[0]);)d[m]("html")[0][n](d[l](o));b[n](c)}var d,e=new Date,f=new Function("return this;")(),g=f.top;try{d=g.document}catch(p){}void 0===d&&(g=f,d=g.document);var h=g.DeepTrack||(g.DeepTrack={}),i={},j={},k=Object.freeze;a("hash",function(a){function hash(){return a}return hash}),a("each",function(a,b){b||(b=1);for(var c in i)for(var d=i[c],e=d[b],f=d[5],g=0;g<e.length;++g)a(c,e[g],f,g);(j[b]||(j[b]=[])).push(a)}),a("getInitTime",function(){return e}),a("options",function(a){return i[a][0].options}),a("track",function(a,c){var d,e,f,g,j,k=i[a];return k?(d=k[0],c&&(k[5]=c)):(i[a]=k=[0,e=[],f=[],g=[],j=[],c],k[0]=d=b(k,a,e,1),d.event=b(k,a,f,2,d),d.transform=b(k,a,g,3,d),d.newpage=b(k,a,j,4,d),d.hash=h.hash,d.options={}),d});var l="createElement",m="getElementsByTagName",n="appendChild",o="head";c("//api.deep.bi/scripts/v2/track"+("function"==typeof d.querySelectorAll?"":"-sizzle")+".js"),h.errors=[],g.addEventListener("error",function(a){h.errors.push([new Date,a])},!0)}();
</script>
To enable tracking errors, specify:
deep.options.errors = true
Error event types
| Event Type | Description |
|---|---|
| page-error | A JavaScript, resource or an AJAX HTTP error. |
Error event attributes
| Variable name | Description |
|---|---|
| error.colno | A JavaScript error column number. |
| error.filename | A JavaScript error document filename. |
| error.lineno | A JavaScript error line number |
| error.message | Error message |
| error.responseURL | AJAX response URL of the HTTP error. |
| error.status | AJAX response status code of the HTTP error |
| error.target.nodeName | HTML element name causing a resource error |
| error.target.src | <img> or <script> source causing a resource error |
| error.target.href | <link> URL causing a resource error |
Data Attributes
All collected events will be automatically enriched by a whole set of additional dimensions in the following areas:
- Event
- Time
- Page & Referrer
- Video / Audio
- Iframe
- User
- Location
- Internet Provider
- Weather
- Device
- User engagement
Event Context
| Dimension name | Description |
|---|---|
event.type |
Type of event - see chapter 3 (e.g. video_play) |
event.timestamp |
Timestamp of the event |
event.pingseq |
Sequence number of page ping event. This is a technical parameter that is used for track detailed active user engagement (Attention Time Spent) in accordance to the public Chartbeat methodology |
Time Context
| Dimension name | Description |
|---|---|
event.localtime.year |
Year, e.g. 2020 |
event.localtime.month |
Jan, Feb, Mar, Apr, May, Jun, Jul, Aug, Sep, Oct, Nov, Dec |
event.localtime.monthno |
Number of the month: 1, 2, … 12, where 1 is January, 12 is December |
event.localtime.day |
Day of the month: 1, 2, … [28 / 29 / 30 / 31] |
event.localtime.hour |
Hour of the day: 0, 1, 2, … 23 |
event.localtime.minute |
Minute of the hour: 0, 1, 2, … 59 |
event.localtime.week |
Week of the year: 1, 2, ... 52/53 |
event.localtime.weekday |
Sun, Mon, Tue, Wed, Thu, Fri, Sat |
event.localtime.weekdayno |
0, 1, … 6, where 0 is Sunday, and 6 is Saturday |
event.localtime.utcoffset |
Local timezone offset in minutes from UTC. |
Page Context
To better explain page context data we use an example page from NY Times page:
For this URL, DMA script registers the following attributes:
page.protocol="http"
page.host="www.nytimes.com"
page.hostname="www.nytimes.com"
page.port=""
page.path="/video/movies/100000004142315/anatomy-of-a-scene-the-revenant.html"
page.href="http://www.nytimes.com/video/movies/100000004142315/anatomy-of-a-scene-the-revenant.html"
page.search="?playlistId=1194811622182®ion=video-grid&version=video-grid-thumbnail&contentCollection=Times+Video&contentPlacement=6&module=recent-videos&action=click&pgType=Multimedia&eventName=video-grid-click"
page.query.playlistId="1194811622182"
page.query.region="video-grid"
page.query.version="video-grid-thumbnail"
page.query.contentCollection="Times+Video"
page.query.contentPlacement="6"
page.query.module="recent-videos"
page.query.action="click"
page.query.pgType="Multimedia"
page.query.eventName="video-grid-click"
page.hash="section-btf"
http://www.nytimes.com/video/movies/100000004142315/anatomy-of-a-scene-the-revenant.html?playlistId=1194811622182®ion=video-grid&version=video-grid-thumbnail&contentCollection=Times+Video&contentPlacement=6&module=recent-videos&action=click&pgType=Multimedia&eventName=video-grid-click#section-btf
Page context characterizes the place on the web where users are browsing an article, watching a video and where they came from.
There are two high level groups of parameters: page and referrer.
Page is a web page (URL) where the video was loaded from.
Referrer is a URL of a web page that a user had visited before he or she came to the page.
| Dimension name | Description |
|---|---|
page.domain |
This should be set explicitly by client’s script. |
page.title |
HTML head title of the page |
page.protocol |
Usually http or https |
page.host |
Domain with page.port e.g. www.nytimes.com:8222 |
page.hostname |
Domain, e.g. www.nytimes.com |
page.port |
HTTP protocol port. When a page use the default http port 80, the field is empty. |
page.path |
Part of the URL, excluding page.protcol, page.host, page.search and page.hash |
page.href |
URL of the page |
page.search |
Parameter string in the URL starting after “?” character |
page.query.[parameter] |
Parsed search parameter (see above) where [parameter] is the parameter name. For example URL: http://deep.bi/?utm_source=google&utm_medium=cpcgenerates page.query.utm_source="google"page.query.utm_medium="cpc" |
page.hash |
Parameter string in the URL starting after “#” character |
page.loadtime |
Time to load the page in milliseconds (page-open events only) |
referrer.protocol |
Usually http or https |
referrer.host |
URL with page.port e.g. www.nytimes.com:8222 |
referrer.hostname |
URL of the referrer without protocol, port and path, e.g. www.nytimes.com, m.facebook.com |
referrer.domain |
Domain, e.g. nytimes.com, facebook.com |
referrer.port |
HTTP protocol port. When a page use the default http port 80, the field is empty. |
referrer.path |
Part of the URL, excluding page.protocol, page.host, page.search and page.hash |
referrer.href |
URL of the referrer page |
referrer.search |
Parameter string in the URL starting after “?” character |
referrer.query.[parameter] |
Parsed search parameter (see above) where [parameter] is the parameter name. For example URL: http://deep.bi/?utm_source=google&utm_medium=cpcgenerates referrer.query.utm_source="google"referrer.query.utm_medium="cpc" |
referrer.hash |
Parameter string in the URL starting after “#” character |
Video or Audio Context
DMA script collects all available audio or video attributes when an event occurs. In the table below we list those attributes. In data loaded to DMA the [media] will be replaced by video or audio accordingly. If an attribute is present with one kind of events only (audio or video) we put that in the table.
| Dimension name | Description |
|---|---|
[media].autoplay |
A Boolean attribute; if specified, the video automatically begins to play back as soon as it can do so without stopping to finish loading the data.Note: Some versions of Chrome only acknowledge autostart, rather than autoplay |
[media].controls |
If this attribute is present, the browser will offer controls to allow the user to control video playback, including volume, seeking, and pause/resume playback. |
[media].currentsrc |
The absolute URL of the chosen media resource. |
[media].currenttime |
The current playback time in seconds. |
video.crossorigin |
This enumerated attribute indicates whether to use CORS to fetch the related image. CORS-enabled resources can be reused in the canvas element without being tainted. The allowed values are: anonymous: Sends a cross-origin request without a credential. In other words, it sends the Origin: HTTP header without a cookie, X.509 certificate, or performing HTTP Basic authentication. If the server does not give credentials to the origin site (by not setting the Access-Control-Allow-Origin: HTTP header), the image will betainted, and its usage restricted. use-credentials: Sends a cross-origin request with a credential. In other words, it sends the Origin: HTTP header with a cookie, a certificate, or performing HTTP Basic authentication. If the server does not give credentials to the origin site (throughAccess-Control-Allow-Credentials: HTTP header), the image will be tainted and its usage restricted. When not present, the resource is fetched without a CORS request (i.e. without sending the Origin: HTTP header), preventing its non-tainted used in canvas elements. If invalid, it is handled as if the enumerated keyword anonymous was used. See CORS settings attributes for additional information. |
[media].defaultmuted |
The muted HTML attribute, which indicates whether the media element's audio output should be muted by default. |
[media].defaultplaybackrate |
The default playback rate for the media. |
[media].duration |
The length of the media in seconds, or 0 if no media data is available. |
[media].ended |
Whether the media element has finished playing. |
[media].error |
The most recent error, or null if there has not been an error. |
video.height |
The height of the video's display area, in CSS pixels. |
[media].id |
The id attribute of the media HTML element if specified. |
[media].loop |
A Boolean attribute; if specified, we will, upon reaching the end of the video, automatically seek back to the start. |
[media].mediagroup |
The name of the group of elements it belongs to. A group of media elements shares a common MediaController. |
[media].muted |
A Boolean attribute which indicates the default setting of the audio contained in the video. If set, the audio will be initially silenced. Its default value is false, meaning that the audio will be played when the video is played. |
[media].playbackrate |
The rate at which the media is being played back. |
[media].paused |
Whether the media element is paused. |
video.playingtime |
Video playing time in seconds since previous event (delta). |
[media].preload |
This enumerated attribute is intended to provide a hint to the browser about what the author thinks will lead to the best user experience. It may have one of the following values: none: indicates that the video should not be preloaded. metadata: indicates that only video metadata (e.g. length) is fetched. auto: indicates that the whole video file could be downloaded, even if the user is not expected to use it. the empty string: synonym of the auto value. If not set, its default value is browser-defined (i.e. each browser may have its default value). The spec advises it to be set to metadata. Usage notes: The autoplay attribute has precedence over preload. If autoplay is specified, the browser would obviously need to start downloading the video for playback. The specification does not force the browser to follow the value of this attribute; it is a mere hint. |
video.poster |
A URL indicating a poster frame to show until the user plays or seeks. If this attribute isn't specified, nothing is displayed until the first frame is available; then the first frame is shown as the poster frame. |
[media].seeking |
Whether the media is in the process of seeking to a new position. |
[media].src |
The URL (or URLS) of the media to embed. |
[media].sources.N.src |
The N'th URL of the media source embed in the <source> tag. |
[media].sources.N.type |
The N'th mime type of the media source embed in the <source> tag. |
video.width |
The width of the video's display area, in CSS pixels. |
[media].volume |
The playback volume, in the range 0.0 (silent) to 1.0 (loudest). |
video.videoheight |
The intrinsic height of the resource in CSS pixels, taking into account the dimensions, aspect ratio, clean aperture, resolution, and so forth, as defined for the format used by the resource. |
video.videowidth |
The intrinsic width of the resource in CSS pixels, taking into account the dimensions, aspect ratio, clean aperture, resolution, and so forth, as defined for the format used by the resource. |
Iframe Context
| Dimension name | Description |
|---|---|
iframe.protocol |
Usually http or https |
iframe.host |
Domain with page.port e.g. www.nytimes.com:8222 |
iframe.hostname |
Domain, e.g. www.nytimes.com |
iframe.port |
HTTP protocol port. When a page use the default http port 80, the field is empty. |
iframe.path |
Part of the URL, excluding page.protocol, page.host, page.search and page.hash |
iframe.href |
URL of the page where the video was loaded from, without parameters (page.protocol + page.host + page.path) |
iframe.search |
Parameter string in the URL starting after “?” character |
iframe.hash |
Parameter string in the URL starting after “#” character |
User ID Context
List of user IDs.
| Dimension name | Description |
|---|---|
user.id.deepcookie |
3rd party cookie that installed by DMA script |
user.id.firstparty |
1st party cookie that installed by DMA script |
user.id.duid |
Best-effort user identifier being resolved online both from anonymous and registered ones. |
user.id.session |
Collision-resistant ID used for joining user events within a single page view |
User Attention Context
User attention characteristics.
| Dimension name | Description |
|---|---|
user.attention.active |
Active time spent on page in milliseconds |
user.attention.idle |
Idle time spent on page in milliseconds |
user.attention.total |
Total time spent on page in milliseconds |
User Location Context
User location characterizes physical user location based on user IP address.
| Dimension name | Description |
|---|---|
user.location.countrylong |
Country name based on ISO 3166. |
user.location.countryshort |
Two-character country code based on ISO 3166. |
user.location.region |
Region, state, county or province. |
user.location.city |
City name. |
user.location.ip |
User IP number |
User Device Context
User device context describes characteristics of the device a user is using.
Hardware - device type
| Dimension name | Description |
|---|---|
user.device.hardwareplatform.device.devicetype |
Indicates the type of the device based on values set in other properties, such as IsMobile, IsTablet, IsSmartphone, IsSmallScreen etc. Note that if the device runs on a smart operating system such as Android, Windows Phone etc. but the screen size is less than 2.5 inches, the DeviceType property returns 'SmallScreen'. |
user.device.hardwareplatform.device.ismobile |
Indicates if the device's primary data connection is wireless and the device is designed to operate mostly by battery power (e.g. mobile phone, smartphone or tablet). This property does not indicate if the device is a mobile phone or not. Laptops are not classified as mobile devices under this definition and so IsMobile will be False. |
Hardware - device name
| Dimension name | Description |
|---|---|
user.device.hardwareplatform.name.hardwaremodel |
Refers to the model name or number used primarily by the hardware vendor to identify the device, e.g.SM-T805S. This is not always the name the device is most often known by; use HardwareName for a list of popular device names. |
user.device.hardwareplatform.name.hardwarevendor |
Refers to the name of the company that manufactures the device or primarily sells it, e.g. Samsung. |
Hardware - device features
| Dimension name | Description |
|---|---|
| user.device.screen.width | Refers to the width of the device's screen in inches. This property will return the value 'Unknown' for desktop or for devices which do not have an integrated screen. |
| user.device.screen.height | Refers to the height of the device's screen in inches. This property will return 'Unknown' for desktops or for devices which do not have an integrated screen. |
| user.device.screen.availwidth | Refers to the width of the available space on the device's screen in pixels. |
| user.device.screen.availheight | Refers to the height of the available space on the device's screen in pixels. |
| user.device.screen.orientation | Refers to the orientation of the device's screen. |
| user.device.screen.documentheight | Refers to the height of the document in pixels. |
| user.device.screen.viewportheight | Refers to the height of the device's viewport in pixels. |
Software platform
| Dimension name | Description |
|---|---|
user.device.softwareplatform.name.platformname |
Refers to the name of the software platform (operating system) the device is using. |
user.device.softwareplatform.name.platformvendor |
Refers to the name of the company that developed the operating system. |
user.device.softwareplatform.name.platformversion |
Refers to the version or subversion of the software platform. |
Browser - general
| Dimension name | Description |
|---|---|
user.device.browserua.name.browsername |
Refers to the name of the browser. Many mobile browsers, by default, come with an operating system (OS). Unless specifically named, these browsers are named after the accompanying OS and/or the layout engine. |
user.device.browserua.name.browserversion |
Refers to the version or subversion of the browser. |
user.device.crawler.miscellaneous.iscrawler |
Indicates if the source of the web traffic operates without human interaction, primarily for the purpose of indexing the response. Such sources are typically used by search engines, and can be referred to as crawlers, bots, robots or spiders, among other terms. This property can also refer to API calls that process websites to extract the structure data. |
user.device.headers.user-agent |
Full user-agent string |
user.device.browserua.general.dnt |
Indicates whether the Do Not Track (DNT) is enabled in the browser. Returns true if DNT is enabled and false otherwise |
User Engagement
User engagement related attributes are calculated in real-time as the user interacts with the product. All available data points and events (both custom and default) are enriched with the following features:
- Recency - is the number of days since a user has used the product. The higher the value, the more you should try to bring users back.
- Frequency - is the number of days a user has been using the product. E.g. a monthly frequency of 15 means that the user used the product 15 days a month. This metric is critical in order to evaluate if a user has a habit of using the product. And the weaker the habit, the higher a user's churn propensity. The goal is to bring back users often until they learn a usage routine.
- Volume - this should be the most important usage indicator. For news publishers it represents the number of articles read or the time actively spent on the website; for radios, it can mean time spent listening; for music services, number of songs played etc. This can be also a combination of different usage interactions. The key point here is to make sure that the product provides good value and users do not quit their sessions unsatisfied.
| Dimension | Description |
|---|---|
user.engagement.days_since_first_visit |
the number of days since a first user visit |
user.engagement.days_since_last_visit |
the number of days since the last user visit |
user.engagement.frequency.visit.lastNdays |
frequency, measured as the number of days a user visited the website, during the last N days (including today) |
user.engagement.recency.daily_visit |
number of days since the last user visit (updated on a daily basis) |
user.engagement.recency.weekly_visit |
number of weeks since the last user visit (updated on a weekly basis) |
user.engagement.recency.monthly_visit |
number of months since the last user visit (updated on a monthly basis) |
user.engagement.volume.attention.lastNdays |
volume, measured as total active attention time, in minutes, for the last N days (including today) |
user.engagement.volume.attention_daily_avg.lastNdays |
daily average volume, measured as the total active attention time, in minutes divided by visit frequency (the number of visit days), during the last N days (including today) |
user.engagement.volume.visit.lastNdays |
volume, measured as the number of visits (page-open events), during the last N days (including today) |
user.engagement.volume.visit_daily_avg.lastNdays |
daily average volume, measured as the number of visits (page-open events) divided by visit frequency (the number of visit days), during the last N days (including today) |
By default, the above engagement metrics are computed for the last 30 days:
| All default dimension names |
|---|
user.engagement.frequency.visit.last30days |
user.engagement.recency.daily_visit |
user.engagement.recency.monthly_visit |
user.engagement.recency.weekly_visit |
user.engagement.volume.attention.last30days |
user.engagement.volume.attention_daily_avg.last30days |
user.engagement.volume.visit.last30days |
user.engagement.volume.visit_daily_avg.last30days |
The attributes are calculated for individual end-user profiles. Typically, unified user.id.duid identifier, which
represents an individual user ID after mapping, is used. In practice, registered users will have a single profile, while
multiple anonymous identifiers can be related to a single profile if they can be mapped using the same registered user
ID.
Scores
In addition to the basic metrics normalized scores and levels are calculated. The scores are always between 0 and 100. Levels are scores rounded to the nearest ten, resulting in values between 0 and 9. The RFV Engagement Score is calculated based on normalized Recency, Frequency and Volume metrics defined above.
| Dimension | Description |
|---|---|
user.engagement.score.frequency.lastNdays |
normalized Frequency Score (0-100), for the last N days (including today). The score is calculated as Frequency divided by N (the number of days taken into account) |
user.engagement.score.frequency_change.overNdays |
relative change in frequency score, measured as the number of days a user visited the website, between the current last N days period and the previous one |
user.engagement.score.loyalty |
normalized Loyalty Score (0-100). The score is calculated as a geometric mean of the normalized number of days since first visit and the recent visit frequency |
user.engagement.score.recency |
normalized Recency Score (0-100) |
user.engagement.score.rfv.lastNdays |
normalized RFV Score (0-100), calculated as the geometric average of normalized Recency, Frequency and Volume scores, for the last N days (including today) |
user.engagement.score.rfv_change.overNdays |
relative change in RFV score between the current last N days period and the previous one |
user.engagement.score.visiting_habit.lastNdays |
normalized Visiting Habit Score (0-100). The score is calculated as a geometric mean of normalized Visit Recency deviation and Visit Frequency over last N days. Only days with multiple visits (more than one) are taken into account (i.e. bounce visits are excluded) |
user.engagement.score.volume.lastNdays |
normalized Volume Score (0-100), for the last N days (including today) |
user.engagement.score.volume_change.overNdays |
relative change in volume score, measured as the number of days a user visited the website, between the current last N days period and the previous one |
user.engagement.level |
every user.engagement.score.* has a corresponding user.engagement.level.* dimension - useful for lookups |
Segments
In addition to the numerical metrics users are mapped into multiple different segments.
| Dimension | Description |
|---|---|
user.engagement.segment.rfv.lastNdays |
RFV engagement segment the user belongs to, for the last N days (including today). The dimension can take one of the following values: New, Won-back, Fly-by, Prospective, Engaged, Addicted |
user.engagement.segment.rfv_change.overNdays |
indicates the change in RFV engagement segment over the last N days |
user.engagement.segment.usage_habit |
segment indicating user consumption patterns with one of the following values: Recently Acquired, Recently Re-engaged, Sleeper, Drop-in, Regular, Skimmer, Heavy |
user.engagement.segment.loyalty |
loyalty engagement segment the user belongs to: Recently New, Recently Engaged, Long-time, or Loyal. A user is assigned a loyalty segment only after the second page view. Bounce visit users, who visit only once and never come back will thus never have a loyalty segment value. |
user.engagement.segment.consumption_profile |
segment indicating user consumption profile for media publishers with one of the following values: Newcomer, New Hero, Failed Hype, Loyal Champion, Potential Loyalist, Long-Term Promising, Deadlock, Long-Term at Risk, Hibernating, or Price Sensitive |
Group session context
DMA tracker recognizes user sessions within single domain, similarly to other web tracking solutions.
By default, a session times out after 30 minutes of inactivity and lasts at most 24h (after this time, the session is reset).
For publishers with multiple web / mobile properties it is sometimes required to track user sessions throughout the
whole network. This can be accomplished with groupsession. dimensions.
| Dimension | Description |
|---|---|
groupsession.id |
unique group session ID |
groupsession.eventseq |
sequence number of the event within the group session |
groupsession.seq |
sequence number of the event with specified event.type during the group session |
groupsession.referrer |
first referrer attribute observed within the group session |
groupsession.firstpage |
first page attribute observed within the group session |
groupsession.lastpage |
last page attribute observed within the group session |
groupsession.timespent |
sum of time intervals registered in page-ping events, in seconds. Depending on the attention type, the feature name is one of the following: groupsession.timespent.total, groupsession.timespent.active, groupsession.timespent.idle |
groupsession.videoPlayingTime |
video playing time, in milliseconds, since last event |
groupsession.videoPauseTime |
video pause time, in milliseconds, since last event |
groupsession.videoTotalTime |
total video playing and pause time, in milliseconds, since last event |
groupsession.videoChanged |
indicates whether the video ID changed. Returns true if the video ID changed and no result otherwise |
groupsession.time_since_last_event |
time, in seconds, from last event within the session |
groupsession.duration |
duration, in seconds, between the first and current event |
As sessions may have no clearly defined end, optionally an additional session-timeout
event (event.type="session-timeout") may be sent when the session is timed out and
expired (groupsession.status="expired").
Custom Data Examples
Subdomains & Mobile Domains
Usually publishers employ various types of subdomains:
- special purpose, “technical” subdomains like: www.yoursite.com, ww1.yoursite.com, ww2.yoursite.com
- subject related subdomains, e.g.: technology.yoursite.com, fashion.yoursite.com, etc.
- mobile subdomains: m.yoursite.com
To track traffic from all subdomains, you’ll need to deploy DMA code across all pages. By default, our system treats every subdomain as a separate site. However, there are simple ways to reconfigure it to your convenience.
In "Tracking Settings", you can configure default prefixes that let the system know which domains should be treated separately and which data should be integrated. For example, it is a common practice to setup the system such that prefixes like “www.”, “ww2.” or “m.” are consolidated with the main domain.
The second method to consolidate data into one main domain from other subdomains (or even completely different domains!) is to overwrite an original page domain with the one you want to link data to.
To manually specify a consolidated domain:
deep({"page.domain": "yoursite.com"});
To do this, just put this simple line of code on the webpage that should be consolidated (e.g. mobileversion.yoursite.com, mobileversionofyoursite.com etc.)
Purchase Event
Example structure of a purchase event:
deep.event({
 'event.type': 'purchase',
 'transaction.id': 'q1w2e3',
 'customer.id': 'r4t5y6',
 'customer.name': 'John Doe',
 'customer.email': '[email protected]'
 'product.id': ['12345'],
 'product.name': ['Monthly subscription - Premium'],
 'product.price.value': ['199'],
 'transaction.value': '199',
 'payment.method': 'credit card'
});
If users can make purchases on your site, we reccommend tracking and consolidating these events, with all information related to the transaction, in a single dedicated type of event. You can see the example structure for such events on the right. Use this as an indication for what might be worth tracking and how to adjust the structure of this event to your requirements.
Examples of purchase events:
- subscription purchase (publishing)
- item purchase (e-commerce)
- content purchase on a video platform
Social Event
Example of a social event
deep.event({
 'event.type': 'social-media',
 'social.action': 'share',
 'social.media': 'facebook'
});
If your site has integrated social media platform plugins, you can track how your users interact with them, as well as collect information about channels and types of interactions (e.g. like, share).
Canonical Links
Does your site use query parameters for various tracking purposes (e.g. seeing people who came from an email newsletter)? Alternatively, does your site have multiple URL structures for the same page/article (e.g. domain.com/section/artcle vs m.domain.com/12345)?
By default, DMA is configured to use either the raw path or canonical links (when available). We strongly encourage implementing canonical links to ensure consistent tracking of pages and to prevent seeing multiple listings of the same page in the DMA Dashboard. If you're not familiar with canonical links, check out Google's Guide to Canonical Links.
Enabling canonical links:
deep.options.pageCanonical = true
To utilize the canonical feature, you'll need to ensure that your site defines canonical links for each page (e.g <link rel='canonical'.../>) and that the pageCanonical option is set to true.
Custom Path Variables
Examples of setting the Path Variable:
deep({"page.path": "/some/article/path"});
// or from variable
deep({"page.path": cms.path.variable});
If you are unable or prefer to not use canonical links, you may alternatively set a "Path Variable". The path must start with "/" (forward slash) and we highly recommend that you use a real path used to navigate to this page. The value set for the Path Variable should be generated by your CMS or set to window.location.pathname, so that the same piece of code can be used on all pages.
Custom Page Titles
By default, DMA displays page titles by using the <title> tag in your site's header.
Here, you can set titles like this:
deep({"page.title": "Story Title"});
// or from variable
deep({"page.title": cms.title.variable});
You can override the title used for a page in DMA by setting the Title Variable to a new value. This can be useful when all pages have a common prefix (e.g. "Publication Name: Story Title"), or when most pages share a common site title.
You can set the title variable manually, or populate it dynamically by tying it to a variable in your CMS.
Sections & Authors
So if a page is written by "Bob Johnson" in the section "US Politics", you would set:
deep({
  section: "US Politics",
  'author.name': "Bob Johnson"
});
In DMA, you can filter your content by several parameters (e.g. section or author). In fact, you can filter by any dimension that fits your site’s structure. To implement this feature, you’ll need to set up "section" and "author" variables within the DMA code.
So if a page is co-written by Megan Summers and Kevin Smith in the sections Fashion and Fashion News, you would set
deep({
  section: ["Fashion", "Fashion News"],
  "author.name": ["Megan Summers", "Kevin Smith"]
});
A page can both be in multiple sections and/or have multiple authors, therefore each variable accepts a comma separated list of values (or an array of values).
Example
deep({
  section: cms.sections.variable,
  "author.name": cms.authors.variable
});
The "sections" variable does not need to reflect real sections on the site, but should be thought of as groupings of pages that can be filtered through. Our suggestion: populate these fields dynamically by tying them to a variable in your CMS which globally represents your sections and authors. That way, they can easily be changed.
Using Page Metadata
Example using jQuery helpers:
deep(function(params) {
  params.section = $("#page-info").data("section");
  params["author.name"] = $("#page-info").data("authors");
});
You can also populate these variables by using page metadata, tags that already exist in your code, or a part of your URL structure which contains these values.
In the example here, we have used a function which will be called after the whole page has been already built by the browser, so we can safely access any element on the page - both those above and below our code.
The above code assumes that on your page there is an HTML Tag with the id=”page-info”.
<section id="page-info" data-section="Fashion News" data-authors="Kevin Smith">
Ajax & Infinite Scroll
If your site uses infinite scroll, serves up content dynamically via AJAX, or has pages that change without the URL subsequently changing, or the DOM refreshing, you’ll need to perform some additional implementation.
New page metadata preparation:
deep.newpage({
  'page.path':"/newpath",
  'title': "New title",
  'section': "New Section",
  'author.name': "New Author"
});
Anytime a visitor navigates to a new page or piece of content, you’ll need to call a custom function called event(). This function is specifically designed for this kind of page change, and can be attached to click/swipe events, or to a pixel that is used to trigger content changes. Best practice is to make sure that the event() function is called whenever you change to a new page of content using AJAX, so that they always happen together.
Function call to be triggered when the new page is opened by the user:
deep.event({'event.type':'page-open'});
Simply put, you’re setting the author and section (if they change) ahead of time since we take that data as holdover information when we register the page reload with event({'event.type':'page-open'}). If we do not pass the updated section and author information we’d continue to register the original sections and authors from the previous page. If the new page has no section or author data, simply set that variable to "null".
Next, when the page changes we’ll need to populate the path and title for the new page(s) within the page variable, so that the pings will reflect the new page the visitor is on.
Cookies
DMA uses one first-party cookie.
The _dtentr cookie is used to register if a user has visited the domain before and to calculate visitor frequency.
Disabling Cookies
To disable tracking, specify:
deep.options.doNotTrack = true
Customers who are subject to the EU e-Privacy Directive, or who would prefer not to use cookies, can set the following variable to prevent DMA from using cookies:
Advanced Integration Guide
After completing the basic integration described in our Quick Start Guide it is now time to move on and learn about more advanced use cases of integration, including adding tracking for custom attributes and custom events.
- The dimension name can contain only the following characters:
a-zA-Z0-9.$_-. All other characters will be changed to an underspace (_). - The dimension name cannot exceed 255 characters. All characters above this limit will be cut off.
- Arrays of non-primitive types (e.g. arrays of objects) are not allowed. If you find yourself in situation where you have arrays that do not comply with this rule, you should transform your events to an allowed format. To do that, you could use one of the available data transformations, e.g.
explode(see explode transformation in documentation).
Not complying with these rules may cause platform performance issues or data loss. Please keep that in mind and if you have any questions contact us at [email protected].
Tracking Custom Data
DMA allows you to add custom attributes to automatically collected events or collect your own events with their custom attributes. Examples of custom events:
- preloading ad
- watching ad
- skipping ad
- placing order
- signing up
Examples of custom dimensions (attributes):
- video title
- video author
- video tags
- user id
- user email
- order id
- product name
- product price
Custom Attributes
Example: Add custom dimensions (attributes) to all video events:
<video
  data-title="Rick Astley"
  data-author="Never Gonna Give You Up"
  width="640" height="360" autoplay controls loop
  src="http://web.advertine.com/video/Rick_Astley_Never_Gonna_Give_You_Up_medium.mp4">
</video>
If the DMA main script is loaded, you can easily add custom attributes to automatically collected events. To create your own attribute, follow this schema:
data-yourcustom-attribute="your custom data"
DMA will automatically replace the “data-” part with an appropriate context. For example, if you place your custom attribute inside a <video> tag, DMA will recognize the video context, and your data will look like this:
video.yourcustom.attribute="your custom data"
Custom Events
Example: Register an event when an ad has been watched:
deep.event({"event.type": "ad-watched"});
Registered data:
event.type="ad-watched"
event.timestamp=exact_time_of_an_event
Example: Register user sign up event:
deep.event({
    "event.type": "signup",
    "user.id.email": "[email protected]"});
// or
deep.event({
    "event": {"type": "signup"},
    "user": {"id": {"email": "[email protected]"}}});
Registered data in both examples:
event.type="signup"
event.timestamp=exact_time_of_an_event
user.id.email="[email protected]"
Deep Media Analytics also allow you to collect custom events with custom attributes. To trigger DMA to register an event you can use the previously defined global function deep (see Chapter 2). It takes, as a parameter, your data in JSON format.
DOM Elements
Just like in the HTML DOM, the DMA tracking Element represents any HTML element like P, DIV, A, TABLE, etc.
The minimal element definition should contain two attributes: type and selector.
Example: The element definition:
{
    "type": "article",
    "selector": "#article"
}
type [string] The element type is an arbitrary name set by the website operator. The name does not need to be unique what makes it possible to create various categories of the elements.
selector [string] The selector is any valid element path conforming to the CSS selector definition rules: developer.mozilla.org/en-US/docs/Learn/CSS/Introduction_to_CSS/Selectors
Sending additional DOM element details
Attrubute details makes it possible to set additional attributes of the given DOM element that will be later sent with every event.
Example: Setting
detailsattribute
{
    type: 'article',
    selector: '#article',
    details: {
        id: '',
        category: '',
        author: '',
        "[etc...]"
    }
}
Default attributes of elements
Each element collects and sends the following set of the default attributes:
currentHeight- the height of the element at the time of the eventstartHeight- the height of the element at the time of defining itstartOffsetToDocumentTop- the element's distance from the top of the document at the time of defining the elementviewabletime- time that passed since the last event.
Finding the element attributes in the Analytics dashboards
All attributes are stored in the element object that holds both user defined (selector, type, details) and default DMA attributes (params).
Example: A sample element attributes
element: {
    type: 'article',
    selector: '#article',
    details: {
        id: '1234',
        category: 'sport',
        author: 'Michael Jordan'
    },
    params: {
        currentHeight: 400,
        currentOffsetToDocumentTop: 130,
        startHeight: 400,
        startOffsetToDocumentTop: 130,
        viewabletime: 2000
    }
}
To read an article category from the example data, one should access element.details.category.
Adding new element definitions
Use addElements() method to add new elements to the DMA Tracking. The method accepts an element table as its argument.
Example: Adding new elements to the DMA Tracking
var deep = DeepTrack.track("DATASET_KEY", "INGESTION_KEY");
deep.addElements([
    {
        type: 'article',
        selector: '#article'
        }, {
            type: 'ad',
            selector: 'DIV:nth-child(4) > DIV:nth-child(7) > DIV:nth-child(2) > ARTICLE:nth-child(1)'
        }, {
            type: 'ad',
            selector: '#ad_123'
    }
]);
Tracking scroll depth, viewability and clicks on elements
Tracking elements added to DMA requires setting beforehand tracking mode for these elements. Currently three modes are available:
scrolldepth- tracks scrolling progress of the elementviewable- tracks whether the element is visible on screenclick- tracks clicks on the elements
Sensitive data
You may wish to hide sensitive data like user ids or emails, but still be able to calculate metrics based on them. For this you may use deep.hash(string) function which will hash data prior to sending the event.
Example: Register leaving a comment by registered user event:
deep.event({
    event.type: "user-comment-added",
    userComment: {
        from: deep.hash("[email protected]"),
         inReplyTo: deep.hash("[email protected]")
    }
});
Custom Data Transformations
Deep Media Analytics allow the admin to specify custom data transformations. For the list of available data transformations see Data Transformation section.
Data Validation
Example definition of data validation:
deep.options.validate = {defined: ["dimension.nameA", "dimension.nameB"], timeout: 10}
The validation method of our script allows you to validate the completeness of your data before sending it to the Deep platform.
Following the example, data would be sent if:
- Properties
dimension.nameAanddimension.nameBare set. - After 10 seconds (if the data is still not set).
This method has no effect on values registered by the script. For example, sending the data with a 5 second delay would not affect the collected time of the user's attention time or his/her time spent.
Pixel - no JS measurement
Example usage of the pixel based measurement
<img src="https://api.deep.pl/v1/pixel/[DATASET_KEY]/p.gif?accessKey=[INGESTION_KEY]&gdpr=true&page_href=https%3A%2F%2Fexample.com%2Ftest%2F&referrer_href=&page_title=My%20Test%20Page&event_type=page-open&dimension1=value2019-12-16&tags=tag1&tags=tag2&tags=tag3">
When the regular JavaScript based measurement is not possible, you can push events with arbitrary data do Deep.BI platform using the pixel method. It requests an image from the endpoint URL, but does not insert it into the DOM. Making the image request is enough to transmit information to a server. In Google Tag Manager this method is known as "Custom Image".
The simplest possible form of Deep.BI pixel is
https://api.deep.bi/v1/pixel/[DATASET_KEY]/p.gif?accessKey=[INGESTION_KEY]
This form will save into your Deep.BI space the following information:
| Dimension name | Value |
|---|---|
event.type |
page-open |
user.ua |
User Agent value |
user.location.ip |
IP address (IP4/6) |
event.localtime.* |
Event time |
Such an event is enriched in the data processing pipeline, so in the system there are much more dimensions available:
Cookies in pixel measurement
To save 3rd party cookie associated with the event you must ask the user for a consent and then add gdpr=true parameter to URL:
https://api.deep.bi/v1/pixel/[DATASET_KEY]/p.gif?accessKey=[INGESTION_KEY]&gdpr=true
Cookie identifiers are saved in the usual user.id.deepcookie dimension for the Deep.BI platform.
Page related parameters
Example usage of the pixel based with page related details:
<img src="https://api.deep.pl/v1/pixel/[DATASET_KEY]/p.gif?accessKey=[INGESTION_KEY]&page_href=https%3A%2F%2Fexample.com%2Ftest%2F&referrer_href=https%3A%2F%2Fexample.com%2F&page_title=My%20Test%20Page">
To pass other page related paramemeters you need to add them explicitly to the Pixel URL with the following parameters:
page_href=...- current page URL. Available in Deep.BI aspage.hrefdimension.referrer_href=...- referring URL. Available asreferrer.hrefpage_title=...- title of the page. Available aspage.title
Values from these parameters are subject to data enrichment in the platform and therefore numerous page related derivative dimensions are available in the platform as page.* and referrer.* dimensions. More details.
Other event types
By default events as saved as {"event.type": "page-open"}. Changing the event type is possible with event_type parameter:
https://api.deep.bi/v1/pixel/[DATASET_KEY]/p.gif?accessKey=[INGESTION_KEY]&event_type=purchase
Value of event_type parameter is saved in event.type dimension.
Custom parameters
Example JSON with buyer and purchase item data:
{
    "event.type": "purchase",
    "user_id": "12345",
    "item": "67890",
    "price": 175.00,
    "currency": "USD",
    "item_groups": ["tools", "li-ion", "entry-level"]
}
Corresponding Pixel URL:
https://api.deep.pl/v1/pixel/[DATASET_KEY]/p.gif?accessKey=[INGESTION_KEY]&gdpr=true&event_type=purchase&user_id=12345&item=67890&price=175.00¤cy=USD&item_groups=tools&item_groups=li-ion&item_groups=entry-level
It is possible to send arbitrary values and tables of values in the pixel. Parameter param is then saved to Deep.BI platform in query.param dimension.
To send such an event add all required parameters to the pixel URL.
Integrations
Google Accelerated Mobile Pages (AMP)
Basic usage of Deep.BI tracking in AMP content:
<script async custom-element="amp-analytics" src="https://cdn.ampproject.org/v0/amp-analytics-0.1.js"></script>
<!-- Deep.BI tracking -->
<amp-analytics type="deepbi" id="deepbi">
<script type="application/json">
{
  "vars": {
    "datasetKey": "DATASET_KEY",
    "accessKey": "INGESTION_KEY",
    "gdpr": "true"
  }
}
</script>
</amp-analytics>
<!-- End Deep.BI example -->
Extended usage of Deep.BI tracking in AMP content:
<script async custom-element="amp-analytics" src="https://cdn.ampproject.org/v0/amp-analytics-0.1.js"></script>
<!-- Deep.BI tracking -->
<amp-analytics type="deepbi" id="deepbi">
<script type="application/json">
{
  "vars": {
    "datasetKey": "DATASET_KEY",
    "accessKey": "INGESTION_KEY",
    "gdpr": "true",
    "endpoint": "your.custom.endpoint.example.com"
  },
  "extraUrlParams": {
    "author": "Author's name",
    "article_name": "Article name",
    "tags": ["tag1", "tag2", "tag3"]
    ...
  }
}
</script>
</amp-analytics>
<!-- End Deep.BI example -->
AMP is a Google-backed project designed as an open standard for any publisher to have pages load quickly on mobile devices. The main objective of AMP is to reduce the page load time of the webpages on mobile, load the content first by eliminating the irrelevant elements and improve the overall performance of the website.
Deep.Bi tracking is an official part of AMP Analytics suite and APM usage data can be sent directly to Deep.BI platform.
Implementation
To implement Deep.BI tracking on your AMP page you will need DATASET_KEY and INGESTION_KEY, just like in case of the regular JavaScript tag. Then include in the source code the <amp-analytics type="deepbi" id="deepbi"> snippet as shown here.
The "gdpr" attribute must be set to "true" to generate and save cookies. Your implementation should populate this attribute with a value derived from user's consent to process cookies in accordance with GDPR guidelines. When "gdpr" is not set to "true", all other non cookie based metrics are still processed.
Dimensions defined in "extraUrlParams" section are available in Deep.BI platform with a query. prefix, for instance
query.author, query.article_name, query.tags, etc.
Facebook Instant Articles
Facebook's Instant Articles is a tool for news publishers that optimizes an article's HTML document and enables publishers to serve the content to users much faster (even 10 times faster than traditional web content).
This section covers how to implement Deep.BI tracking with FB IA.
Implementation
Providing a URL to a source of analytics code:
<figure class="op-tracker">
    <iframe src="https://www.myserver.com/trackingcode.html"></iframe>
</figure>
Example contents of the
trackingcode.htmlfile:
    <script type="text/javascript">
      /* Deep Tracker (c) v3.0.16 */
      "use strict";!function(){for(var t,e;!(t=window.document.getElementsByTagName("head")[0]);)window.document.getElementsByTagName("html")[0].appendChild(window.document.createElement("head"));"function"!=typeof window.document.querySelectorAll&&((e=window.document.createElement("script")).type="text/javascript",e.charset="utf-8",e.setAttribute("crossorigin","anonymous"),e.async=!0,e.src=(window.document.location.protocol||"http:")+"//api.deep.bi/v3/sizzle.js",t.appendChild(e)),(e=window.document.createElement("script")).type="text/javascript",e.charset="utf-8",e.setAttribute("crossorigin","anonymous"),e.async=!0,e.src=(window.document.location.protocol||"http:")+"//api.deep.bi/v3/init.js",t.appendChild(e)}();
    </script>

    <script type="text/javascript">
        var deepInitializerListenerId = setInterval(function () {
            if (window.hasOwnProperty("deepTracker") && window.deepTracker && window.deepTracker.isInitialized()) {
                clearInterval(deepInitializerListenerId);
                window.deep = window.deepTracker.track("DATASET_KEY", "INGESTION_KEY");
                window.deep.options.trackconsent = _USER_GDPR_RESPONSE_;
                window.deep.options.media = true;

                window.deep({
                  "content.layout": "instant-article",
                  "content.section": "Section Name",
                  "content.author.name": "John Doe",
                  "content.title": "Lorem ipsum",
                  "content.type": "article",
                  "content.tags": ["tag1","tag2"]
                });
            }
        });
    </script>
To be able to integrate FB IA you must be a registered user of the Deep.BI platform with access to a tracking script and your account credentials. These are mandatory to complete the integration of the Facebook's Instant Articles.
Assuming the above conditions are met and you are using FB IA, please follow the instruction below.
- Include your analytics code into an iframe within HTML5
<figure>tags. - Apply the
op-trackerclass to the<figure>element containing the code (see examples on the right). - Include prepared code into the
<body>section of your article. (Note: tracking within the header is not supported in the FB IA.) - The variable
_USER_GDPR_RESPONSE_must be set totrueto track cookies. Please note this option can be set only once, so you must first ask for the user consent and then run the above snippet. - Accordingly to rules of your local jurisdiction and requirements you may choose to ignore "Do Not Track" browser setting by adding option
window.deep.options.dntignore = true; - It's a good idea to add a parameter / dimension to easily discern events from FB IA. In the example above it is
"content.layout": "instant-article".
Important Notes
- Some of the data attributes that are tracked by default by Deep.BI tracking code might not be included in data sent from FB IA due to the way Facebook handles analytics code.
- If you have defined custom data attributes for your web tracking, we recommend setting custom data attributes describing content, section, authors within the iframe, in the same way you did in your web tracking.
- Traffic from FB IA will be reported as direct traffic under the original URL that is provided by FB. Please keep this in mind. If you prefer marking this traffic you should add a custom data attribute.
- If you have set any custom data transformation we recommend to including them into any analytics code for FB IA as well. Of course, do this if applicable to any dimension that is sent along with FB IA data.
Testing
There are two ways you can test your integration of Facebook's Instant Articles. You can open the article on the Pages Manager or use Facebook's endpoint dedicated for faster testing, which makes it possible to run a test in a browser and debug.
www.ia-tracker.fbsbx.com/instant_article_test?url=<share-url>
If you have followed the above steps and you are still having trouble with integrating Facebook's Instant Article, drop us an email at [email protected]. Please describe what you did and the problem you encountered in your message.
Data Transformations
Our Deep Media Analytics script and Deep Ingestion API support custom server-side data transformation. In this section you learn how you can transform your data to adjust it to your specific needs.
More advanced applications of data transformation include:
- multiple data transformations - You can specify multiple data transformations for an event. If you do so, each transformation will be performed on the result of the previous transformation, except for the first one (which is performed on the original event).
- conditional data transformation - You can specify data transformation using conditional statements; for more information about using conditional transformations, see the Flow Control section.
To initiate data transformation you have to call the "deep transform" function. Assuming you have defined a global variable deep previously, calling a transformation function would look like this: deep.transform();
PathSpecifier
PathSpecifiermay be referred to using:
"path.to.field"
or
["path", "to", "field"]
In some definitions of the transformation methods below you may see PathSpecifier. It simply points at a specific field of the event, and can be referred in two ways:
"path.to.field"["path", "to", "field"]
dateSplit
dateSplitdefinition
({
  "dateSplit": {
    "fromField": PathSpecifier,
    "toField": PathSpecifier,          // "path.to.destination" or ["path", "to", "destination"],
    "mode": "merge"                    // or "overwrite" by default
    "utcoffset": PathSpecifier         // none by default
    "unit": "seconds",                 // only when fromField is a number, default: "milliseconds"
    "epoch": "1970-01-01T00:00:00.000Z" // only when fromField is a number, default: 0
    "parts": ["year","month","weekday"] // default: "datetime weekday weekdayno utcoffset"
    "rename": { // optional mapping of date parts to field names
      "year":       "year",
      "month":      "month",
      "monthno":    "monthno",
      "day":        "day",
      "hour":       "hour",
      "minute":     "minute",
      "second":     "second",
      "fraction":   "fraction",
      "millisecond":"millisecond",
      "utcoffset":  "utcoffset",
      "weekday":    "weekday",
      "weekdayno":  "weekdayno",
      "isoweekday": "isoweekday",
      "week":       "week",
      "isoweek":    "isoweek"
    }
  }
})
Example of
dateSplitusage:
    deep({"published.date": "2016-03-23T23:00:01.006+02:00"}});
    deep.transform({dateSplit: {
      fromField: "published.date",
      toField: "published",
      mode: "merge"}
    });
As a result you'll see this data in your analytics:
{
  "publication": {
    "date":"2016-03-23T23:00:01.006+02:00",
    "year": 2016,
    "month": "Mar",
    "monthno": 3,
    "day": 23,
    "hour": 23,
    "minute": 0,
    "second": 1,
    "weekday": "Wed",
    "weekdayno": 3,
    "utcoffset": 120
  }
}
A dateSplit transformation allows the end user to parse collected date information (e.g. article published date) into separate dimensions like year, month, day, hour and more.
| Parameter | Presence | Description |
|---|---|---|
| fromField | required | Source dimension |
| toField | required | Destination dimension |
| mode | optional |
Values: - overwrite (default) - merge (keeps the original date)
|
| utcoffset | optional | None by default. Allows the setting of a UTC time offset after the time has been parsed from a path. A constant utc offset may be specified. |
| unit | required* |
Required only when fromField is a number. Default: millisecondsValues: - milliseconds, msec, ms for milliseconds - seconds, sec, s for seconds |
| epoch | required* | Required only when fromField is a number. Default: 0. Epoch must be an ISO time string or a number of time units (milliseconds or seconds) since 1970-01-01 00:00:00 UTC. |
| parts | optional | Array of date parts to be parsed from a source dimension. Default: ["datetime weekday weekdayno utcoffset"]. Possible values: ["year","month","monthno","day","hour","minute","second","fraction","millisecond","utcoffset","weekday","weekdayno","isoweekday","week","isoweek"]
There are "shortcut" values possible to specify: "all" - all fields are extracted
"date" - same as ["year","month","monthno","day"]
"time" - same as ["hour","minute","second"]
"datetime" - same as ["year","month","monthno","day","hour","minute","second"]
|
| rename | optional | Custom mapping of date parts to field names. |
explode
explodedefinition:
({
  "explode": {
    "fromField": PathSpecifier,   // optional if missing or empty the root object will be exploded
    "rename": "singleName",       // optional
    "keyName": "key",             // optional
    "lengthName": "length"        // optional
  }
})
With the explode transformation, you can produce two or more events from one, depending on the number of different values under key provided as an argument.
| Parameter | Presence | Description |
|---|---|---|
| fromField | optional | Source dimension. If not specified, the root object will be exploded. |
| rename | optional | New dimension name. |
| keyName | optional | Name for the index dimension. |
| lengthName | optional | Name for the index count. |
Input event:
{
  "user":{
    "email":"[email protected]",
    "imei":"1234567890"
  },
  "hits":[
  {
    "ts":1438326410895,
    "phoneInfo":{
      "ip":"192.168.0.24",
      "nt": "offline",
      "awaketime":21227484
    }
  },
  {
    "ts":1438326400624,
    "phoneInfo":{
      "ip":"192.168.0.24",
      "pl":"Android",
      "awaketime":21217173
    }
  }
  ],
  "deviceTs":1438326415401
}
Lets follow this with an example. We have an input event with a hits key that happens to have a value with an array of non-primitive type, hence it does not comply with JSON's extended requirements. You can use the explode method to transform this event into three separate events.
Definition of transformation with
explodemethod which takes as an argument thehitsfield:
deep.transform({  "explode": {
    "fromField": ["hits"],
    "rename": "hit"
  }
});
As a result of above transformation we get two events with a new renamed key (from
hitstohit):
[
  {
    "user": {
      "email":"[email protected]",
      "imei":"1234567890"
    },
    "hit": {
      "ts": 1438326410895,
      "phoneInfo": {
        "ip": "192.168.0.24",
        "nt": "offline",
        "awaketime": 21227484
      }
    },
    "deviceTs": 1438326415401
  },
  {
    "user": {
      "email":"[email protected]",
      "imei":"1234567890"
    },
    "hit": {
      "ts": 1438326400624,
      "phoneInfo": {
        "ip": "192.168.0.24",
        "pl": "Android",
        "awaketime": 21217173
      }
    },
    "deviceTs": 1438326415401
  }
]
explodeToEntries
explodeToEntriesdefinition
({
  "explodeToEntries": {
    "fromField": PathSpecifier,   // optional if missing or empty, the root object will be exploded
    "rename": "singleName",       // optional
    "keyName": "myKey",           // optional, "key" by default
    "valueName": "myValue",       // optional, "value" by default
    "lengthName": "length"        // optional
  }
})
Using the explodeToEntries transformation is very similar to the explode method. The only difference is that, with this transformation, you explode the name of the key and its values to new fields.
| Parameter | Presence | Description |
|---|---|---|
| fromField | optional | Source dimension. If not specified root object will be exploded. |
| rename | optional | New dimension name. |
| keyName | optional | Name of the index dimension. Default: key |
| valueName | optional | Name of the value of the dimension. Default: value |
| lengthName | optional | Name of the index count. |
Let's use the following event as an example of the
explodeToEntriestransformation:
{
  "event": {"type": "purchase"},
  "order": {"id": "00001"},
  "lines": {
    "products": {
      "product01": {"amount": 2},
      "product02": {"amount": 4},
      "product03": {"amount": 6}
    }
  }
}
The follwing is the definition of any transformation with the
explodeToEntriesmethod which takes thehitsfield as an argument:
// Notice that `keyName` and `valueName` were not specified
// default values will be used instead (respectively `key` and `value`).

deep.transform({"explodeToEntries": {
  "fromField": ["lines", "products"],
  "rename": "product"
}});
The result of this transformation is three separate events, with
hitfields that have two attributes fields -keyandvalue- that contain the source key and value.
{
  "event": {"type": "purchase"},
  "order": {"id": "00001"},
  "lines": {
    "product": {
      "key": "product01",
      "value": {"amount": 2}
    }
  }
}
{
  "event": {"type": "purchase"},
  "order": {"id": "00001"},
  "lines": {
    "product": {
      "key": "product02",
      "value": {"amount": 4}
    }
  }
}
{
  "event": {"type": "purchase"},
  "order": {"id": "00001"},
  "lines": {
    "product": {
      "key": "product03",
      "value": {"amount": 6}
    }
  }
}
move
movedefinition:
({
  "move": {
    "fromField": PathSpecifier,
    "toField": "path.to.destination",  // or ["path", "to", "destination"],
                                       // optional (if empty or not set moves to root of object)
    "mode": "merge"                    // or "overwrite" by default
  }
})
Example input event:
{
  "foo": {
    "bar": {
      "baz": 1
    }
  },
  "abc": "xyz"
}
Definition of
movetransformation for the event:
deep.transform({"move": {
  "fromField": ["foo", "bar"],
  "toField": ""
}});
As a result of the transformation, the contents of the
barfield was moved:
{
  "foo": {},
  "baz": 1,
  "abc": "xyz"
}
Move a field value to different field (path).
| Parameter | Presence | Description |
|---|---|---|
| fromField | required | Source dimension. |
| toField | optional | Target dimension. If not specified, moves the value to the root of the object. |
| mode | optional | Transformation type. Values: - overwrite (default) - merge |
delete
'delete' definition:
({
  "delete": {
    "field": PathSpecifier
  }
})
Lets try to delete the foo.bar field from the following event as an example:
Input event:
{
  "foo": {
    "bar": {
      "baz": 1
    }
  },
  "abc": "xyz"
}
Definiton of a transformation with
deletethat takes as argument thefoo.barfield:
deep.transform({"delete": {
  "field": ["foo", "bar"]
}});
Result event:
{
  "foo": {},
  "abc": "xyz"
}
Deletes a specified field from an event.
| Parameter | Presence | Description |
|---|---|---|
| field | required | Destination dimension. |
set
setdefinition
({
  "set": {
    "field": PathSpecifier, // path to field
    "value": "some value"
  }
})
As an example, we can set a new field for the following event:
{
  "user":{
    "androidID":"bec078d91ee610c5"
  },
  "hit": {
    "ts":1438326410895,
    "phoneInfo":{
      "dc":"CF"
    }
  }
}
Definition of the
settransformation that adds (or overwrites if exists) anevent.typefield to the event withphone-infoas its value:
deep.transform({"set": {
        "field": "event.type",
        "value": "phone-info"
}});
Transforming the event with a new field:
{
  "user": {
    "androidID": "bec078d91ee610c5"
  },
  "hit": {
    "ts": 1438326410895,
    "phoneInfo": {
      "dc": "CF"
    }
  },
  "event.type": "phone-info"
}
Sets a new value for a data attribute. With a set transformation, you can set a new value (overwrite) for an existing data attribute, or set a specified value for some new attribute.
| Parameter | Presence | Description |
|---|---|---|
| field | required | Destination dimension. |
| value | required | New value for the dimension. |
extractEntries
extractEntriesdefinition:
({
  "extract": {
    "fromField": PathSpecifier,
    "extractKey": "key",        // default "key"
    "extractValue": "value",    // optional
    "prefixKey": "prefix",      // optional
    "suffixKey": "suffix"      // optional
  }
})
With extractEntries transformation you can extract the values of key:value pairs from an event.
| Parameter | Presence | Description |
|---|---|---|
| fromField | required | Source dimension. |
| extractKey | optional | The name of the attribute with key name. Default: key |
| extractValue | optional | The name of the attribute with the value of the key. |
| prefixKey | optional | Prefix for the extracted value. |
| suffixKey | optional | Suffix for the extracted value. |
An example of an input event with separate
keyandvaluefields:
  {
    "foo": {
      "bar": [
        {"key": "aaa", "value": 1},
        {"key": "bbb", "value": 2},
        {"key": "ccc", "value": 3}
      ]
    }
  }
Definition of a transformation using the
extractEntriesmethod:
deep.transform({"extractEntries": {
  "fromField": ["foo", "bar"],
  "extractKey": "key",
  "extractValue": "value"
}});
Resulting event from the specified transformation:
{
  "foo": {
    "bar": {
      "aaa": 1,
      "bbb": 2,
      "ccc": 3
    }
  }
}
extractEntriesWithIndex
extractEntriesWithIndexdefinition
({
  "extractEntriesWithIndex": {
    "fromField": PathSpecifier,
    "indexToKey": "append",     // optional or "prepend", "append" by default
    "extractValue": "value",    // optional
    "extractKey": "key",        // optional
    "prefixKey": "prefix",      // optional
    "suffixKey": "suffix",      // optional
    "joinIndexWith": ""         // optional, "." by default
  }
})
Here is the transformation method for extracting values from an event and indexing the extracted values:
| Parameter | Presence | Description |
|---|---|---|
| fromField | required | Source dimension. |
| extractKey | optional | The name of the attribute with its key name. Default: key |
| extractValue | optional | The name of the attribute with value of the key. |
| prefixKey | optional | Prefix for the extracted value. |
| suffixKey | optional | Suffix for the extracted value. |
| indexToKey | optional | Placing of the index. Values: - append (default) - prepend |
| joinIndexWith | optional | Index separator. Default: "." |
Below is an example input event from which an
idvalue can be extracted from afoo.barfield:
  {
    "foo": {
      "bar": [
        {"id": 7},
        {"id": 42}
      ]
    }
  }
Below is the definition of an
extractEntriesWithIndextransformation where the value ofidis extracted from afoo.barfield
deep.transform({"extractEntriesWithIndex": {
  "fromField": ["foo", "bar"],
  "extractValue": "id",
  "prefixKey": "id."
}});
As a result, the transformed value of
idwas extracted to a new indexed field with a specified prefix:
{
  "foo": {
    "bar": {
      "id.0": 7,
      "id.1": 42
    }
  }
}
compact
compactdefinition
({
  "compact": {
    "field": PathSpecifier,    // optional (if omitted or empty compacts whole input)
    "keepEmptyObjects": true   // optional false by default
  }
})
Removes input entries with empty objects, arrays and null values. If a field is empty, the whole input is compacted. If an input becomes empty, it will be left empty.
| Parameter | Presence | Description |
|---|---|---|
| field | optional | Target field. If empty, the whole input is compacted. |
| keepEmptyObjects | optional | Keeps empty objects if set to True. Default: false
|
Example event that contains a few null/empty fields:
{
  "event": "abc",
  "some": "property",
  "level0a": {
    "level1": {
      "level2a": {
        "date": "2016-03-23T23:00:00.006Z"
      },
      "level2b": [],
      "level2c": null
    }
  },
  "level0b": []
}
Definition of a transformation, with the
compactmethod using a specifiedlevel10afield for compacting:
deep.transform({"compact": {
  "field": ["level0a"]
}});
As a result of the transformation, entries
level12bandlevel12cwere dropped from the event:
{
  "event": "abc",
  "some": "property",
  "level0a": {
    "level1": {
      "level2a": {
        "date": "2016-03-23T23:00:00.006Z"
      }
    }
  },
  "level0b": []
}
flatten
flattendefinition
({
  "flatten": {
    "field": PathSpecifier,    // optional (if omitted or empty flattens everything)
    "separator": "_",          // optional key space separator, default is "."
    "arrayDelimiter": ";"      // optional array flat join delimiter, default is ","
  }
})
Reduces the levels of nested objects within an event by creating dimensions based on them.
| Parameter | Presence | Description |
|---|---|---|
| field | optional | Target field. If empty flattens |
| separator | optional | Space separator. Default: "."
|
| arrayDelimiter | optional | Flat join delimiter ",". Default: false
|
Example event - notice the nested content of the
level10field:
{
  "event": "abc",
  "some": "property",
  "level0": {
    "level1": {
      "level2a": {
        "date": "2016-03-23T23:00:00.006Z"
      },
      "level2b": ["a","b","c"]
    }
  }
}
Definition of the
flattentransformation forlevel10:
deep.transform({"flatten": {
  "field": ["level0"],
  "separator": "-",
  "arrayDelimiter":"_"
}});
The transformed event:
{
  "event": "abc",
  "some": "property",
  "level0": {
    "level1-level2a-date": "2016-03-23T23:00:00.006Z",
    "level1-level2b": "a_b_c"
  }
}
Flow Control
Flow Control methods allows to perform conditional data transformations on collected data.
Methods
ifconstruct
{
  "if": {
    "condition": Condition,
    "then": Expression or ExpressionList,
    "else": Expression or ExpressionList        // optional
  }
}
caseconstruct
{
  "case": [
    {
      "condition": Condition,
      "then": Expression or ExpressionList
    },
    {
      "condition": Condition,
      "then": Expression or ExpressionList
    },
      ...
    { "else": Expression or ExpressionList }
  }
}
switchconstruct
{
  "switch": {
    field: PathSpecifier,
    cases: [
      {
        "when": "ABC", "then": Expression or ExpressionList
      },
      {
        "when": "XYZ", "then": Expression or ExpressionList
      },
      {
        "when": ["Alpha", "Beta"],
        "then": Expression or ExpressionList
      },
      ...
      { "else": Expression or ExpressionList },
    ]
  }
}
Flow Control supports conditional data operations with use of if, case and switch statements. See the definitions of these on the right.
Condition
For some of the conditional statements you have to specify condition. The way this should be displayed is to the right.
Example
conditionconstruct:
{
  FieldCondition: {
    "field": PathSpecifier,
    // additional arguments
  }
}
Example
ifstatement with the conditional use of thesettransformation method:
{
  "if": [
    {
      "condition": {            // condition definition
        "isPlainObject": {        // `isPlainObject` condition specification
          "field": "phoneInfo"
        }
      },
      "then": [                    // conditional operation
        {
          "set": {                // `set` transformation specification
            "field": [
              "event.type"
            ],
            "value": "phoneInfo"
          }
        }
      ]
    }
  ]
}
FieldCondition
List of the FieldCondition values available:
"exists""isEmpty""isObject""isPrimitive""isPlainObject""isArray""isString""isNumber""isNull"
LogicalModifier
It is possible to specify more than one condition for the conditional statements using the following logical modifiers:
"not"- expects Condition as value"or"- expects array of Conditions as value"and"- expects array of Conditions as value
CompareFieldCondition
Example
iscomparison:
{
  "is": {
    "field": PathSpecifier,
    "compare": "eq"          // optional, by default "eq" or "="
                             // also "<" or "lt", ">" or "gt", "<=" or "lte", ">=" or "gte"
                             // also "<>" or "!=" or "neq"
                             // also "in"
    "value": Primitive or array of Primitives
  }
}
Example
hasLengthcomparison:
{
  "hasLength": {
    "field": PathSpecifier,
    "compare": "eq"          // optional, by default "eq" or "="
                             // also "<" or "lt", ">" or "gt", "<=" or "lte", ">=" or "gte"
                             // also "<>" or "!=" or "neq"
                             // also "in"
    "value": Primitive or array of Primitives
  }
}
For conditional data transformations you can compare the value of the specific field or fields of an event using the following statements:
is- compares the field valuehasLength- compares the length of the field valueeqor=- equal to<orlt- less than>orgt- greater than<=orlte- less than or equal to>=orgte- greater than or equal to<>or!=orneq- not equal toin- is one of the values in a set
Example: if
Here is an example of input data with two different
evenTypevalues. Let's change the value for one of these events with anifstatement:
[
  {
    "eventType": "typeA",
    "value": 10
  },
  {
    "eventType": "typeB",
    "value": 20
  }
]
To change the value of
eventType, you can useifwith asettransformation as follows:
deep.transform({
    "if": {
      "condition": {
        "is": {
          "field": "eventType",
          "compare": "eq",
          "value": "typeA"
        }
      }
    },
    "then": {
      "set": {
        "field": "eventType",
        "value": "typeC"
      }
    }
});
As a result of this transformation, the value
typeAwas set totypeCfor one of the events that met the conditions of a specified transformation:
[
  {
    "value": 10,
    "eventType": "typeC"
  },
  {
    "eventType": "typeB",
    "value": 20
  }
]
Example: case
Here is an example of input data for two different events. Let's change the
valuefor one of these events with acasestatement:
[
  {
    "eventType": "typeA",
    "value": 10
  },
  {
    "eventType": "typeB",
    "value": 20
  }
]
To change the
valuefield for one of the events, you can usecaseto compare the value ofeventTypeand transform it with thesetmethod as follows:
deep.transform({
    "case": [
      {
        "condition": {
          "is": {
            "field": "eventType",
            "compare": "eq",
            "value": "typeA"
          }
        },
        "then": {
          "set": {
            "field": "value",
            "value": "30"
          }
        }
      }
    ]
  }
);
As a result of this transformation, the value of the field
valuewas set to30for one of the events that met the conditions of the specified transformation:
[
  {
    "value": 30,
    "eventType": "typeA"
  },
  {
    "eventType": "typeB",
    "value": 20
  }
]
Example: switch
Here is an example of input data for two different events. Lets change the
valuefor both of these events with aswitchstatement
[
  {
    "eventType": "typeA",
    "value": 10
  },
  {
    "eventType": "typeB",
    "value": 20
  }
]
To change the
valuefield for these events, you can useswitchto compare the value ofeventTypeand transform it with thesetmethod as follows:
deep.transform({
    "switch": {
      "field": "eventType",
      "cases": [
        {
          "when": "typeA",
          "then": {
            "set": {
              "field": "value",
              "value": "20"
            }
          }
        },
        {
          "when": "typeB",
          "then": {
            "set": {
              "field": "value",
              "value": "40"
            }
          }
        }
      ]
    }
  }
);
As a result of this transformation, the value of the field
valuewas changed according to the specified transformation:
[
  {
    "eventType": "typeA",
    "value": 20
  },
  {
    "eventType": "typeB",
    "value": 40
  }
]
Ingestion API
Introduction
The Ingestion API lets you ingest data to the Deep.BI analytics engine. In this simple way you can measure your KPIs by tracking any event that people or machines generate, such as:
- purchases
- app downloads
- web page impressions
- signups
- location data from beacons
- data from wearables
- clicks in marketing campaign
- social media events, like twitter posts
- ... or any custom event you need.
The Deep.BI Ingestion API is a HTTP REST API and it accepts data in a JSON format.
Authorization
To send your data to Deep.BI you'll need your DATASET_KEY and INGESTION_KEY.
DATASET_KEY determines your data endpoint. You can have any number of endpoints you want, such as for different stores, projects or clients (if you provide analytics to your customers using the Deep.BI platform).
INGESTION_KEY is your personal authorization write key which you must provide in order to send data.
If you already have a Deep.BI account, please visit the API Keys tab in Settings where DATASET_KEY is listed under the "Stream Key" name and INGESTION_KEY is referenced as "Ingestion API Personal Key". The API Keys tab is accessible only by admin users. If you have any questions or need help, please contact us at [email protected].
Send Event
Example JSON with buyer and purchase item data (
event1.json):
{
    "event.type": "purchase",
    "user_id": "12345",
    "user_email": "[email protected]",
    "item": "67890",
    "price": 175.00,
    "currency": "USD"
}
Sending an event:
curl "https://api.deep.bi/v1/streams/DATASET_KEY/events/data?accessKey=INGESTION_KEY" \
  -H "Content-Type: application/json" -d @event1.json
Let's start with the simple case of tracking a transaction in an online store.
JSON objects are represented by keys and values. In Deep.BI, keys will become dimensions or metrics, depending on how you would like your data to be interpreted. One important thing to note: you don't have to make the decision while ingesting data. Just send it as is, and decide later, while querying your data for analysis.
Now we will send this event via API using a POST request. In this example we are using cURL, a command line tool. You can use any programming language you want.
Sending an Event with a Timestamp
Example JSON (
event2.json)
{
  "event.type": "purchase",
  "event_time": "2015-10-12T14:42:15.123Z",
  "user_id": "12345",
  "user_email": "[email protected]",
  "item": {
    "id": "67890",
    "url": "http://www.myshop.com/item/1234565",
    "name": "Nike Air Zoom Structure 19 Flash iD",
    "categories": ["clothing", "shoes", "athlete shoes"],
    "brand": "Nike",
    "color": "graphite",
    "size": 9
  },
  "price": 175.00,
  "currency": "USD"
}
Sending an Event with "getEventTime":
curl "https://api.deep.bi/v1/streams/DATASET_KEY/events/data?getEventTime=event_time" \
  -H "Authorization: Bearer INGESTION_KEY" \
  -H "Content-Type: application/json" -d @event2.json
Values of event dimensions can be a string, a number, or an array of strings/numbers. You can also nest objects to group dimensions under a single key.
This time we'd like to provide more data about the item, like its name, its page URL, and the item's categories and parameters.
In the previous event, we did not provide a transaction timestamp, so the API simply assigned a timestamp (i.e. the time when our server received your data). This time, we want to send the time when the user actually purchased the item. To do this, just add a dimension containing that time in ISO 8601 format and tell our API where we should look for it using the getEventTime parameter.
Sending an Event with a Specific ID
Sending an event with "identifyBy":
curl "https://api.deep.bi/v1/streams/DATASET_KEY/events/data?identifyBy=user_id" \
  -H "Authorization: Bearer INGESTION_KEY" \
  -H "Content-Type: application/json" -d @event2.json
By default, the API identifies a user by the user.id.deepcookie attribute to properly order events in the session. This behavior may be changed using the identifyBy parameter (similarly as in the getEventTime parameter case) and providing the name of the identifying attribute.
Sending an Event with a Transformation
Let's use the following event as an example and send it with cURL using data transformation:
[
  {
    "eventType": "typeA",
    "value1": 10,
    "value2": [1, 2, 3]
  },
  {
    "eventType": "typeB",
    "value1": 18,
    "value2": [4, 5, 6]
  },
  {
    "eventType": "typeC",
    "value1": 20,
    "value2": {
      "a": 1,
      "b": 2,
      "c": 3
    }
  }
]
Input data with specified transformation
Note that the transformation is conditional and is using a logical AND modifier, hence both conditions must be met in order for transformation to take place
{
  "transformation": {
    "case": [
      {
        "condition": {
          "and": [
            {
              "isArray": {
                "field": ["value2"]
              }
            },
            {
              "is": {
                "field": ["value1"],
                "compare": "lt",
                "value": 11
              }
            }
          ]
        },
        "then": {
          "move": {
            "fromField": [
              "eventType"
            ],
            "toField": [
              "newEventType"
            ],
            "mode": "merge"
          }
        }
      }
    ]
  },
  "data": [
    {
      "eventType": "typeA",
      "value1": 10,
      "value2": [1, 2, 3]
    },
    {
      "eventType": "typeB",
      "value1": 18,
      "value2": [4, 5, 6]
    },
    {
      "eventType": "typeC",
      "value1": 20,
      "value2": {
      "a": 1,
      "b": 2,
      "c": 3
      }
    }
  ]
}
Sending the data with cURL request:
curl "https://api.deep.bi/v1/streams/DATASET_KEY/events/data?accessKey=INGESTION_KEY"
-H "Content-Type: application/json" --data \
'{"transformation":{"case":[{"condition":{"and":[{"isArray":{"field":["value2"]}},{"is":{"field":["value1"],"compare":"lt","value":11}}]},"then":{"move":{"fromField":["eventType"],"toField":["newEventType"],"mode":"merge"}}}]},"data":[{"eventType":"typeA","value1":10,"value2":[1,2,3]},{"eventType":"typeB","value1":18,"value2":[4,5,6]},{"eventType":"typeC","value1":20,"value2":{"a":1,"b":2,"c":3}}]}'

# or sending the data in a json file

curl "https://api.deep.bi/v1/streams/DATASET_KEY/events/data?accessKey=INGESTION_KEY" \
  -H "Content-Type: application/json" -d @event1.json
Output event
Notice that only the "typeA" event was changed; other events have not met the conditions of the transformation
[
  {
    "value1": 10,
    "value2": [
      1,
      2,
      3
    ],
    "newEventType": "typeA"
  },
  {
    "eventType": "typeB",
    "value1": 18,
    "value2": [
      4,
      5,
      6
    ]
  },
  {
    "eventType": "typeC",
    "value1": 20,
    "value2": {
      "a": 1,
      "b": 2,
      "c": 3
    }
  }
]
Data transformation can be used with the Ingestion API and they work on a similar basis to the javascript snippet. That applies to Flow Control functions as well, since they are part of data transformation.
For more information about data transformations see the following sections:
- Data Transformation - describes available data transformations
- Flow Control - describes conditional use of data transformations
Sending multiple events in a single message
To optimize data sending, multiple small JSON events may be joined into a single package. For example, instead of sending:
json
    {"example":1}
    {"example":2}
    {"example":3}
separately, they could be joined into a JSON array:
json
[{"example":1}, {"example":2}, {"example":3}]
and be sent together.
In practice, sending data packages around 5 MB in size optimizes the network throughput.
Data ingestion constraints
Single event can not exceed 0.5MiB (524288 bytes). The data package can not exceed 20MiB (20971520 bytes).
Analytics API
Introduction
The Analytics API allows you to query your data using an HTTP REST API.
Authorization
To read your data you'll need two keys, named: DATASET_KEY and ANALYTICS_KEY, respectively
DATASET_KEY determines which data you are querying. This is the same key you have been using to send data to the Deep platform.
ANALYTICS_KEY is the authorization key related to your account that allows you to query data.
You can authorize your request by using either:
- http head
Authorization: Bearer ANALYTICS_KEY - url query parameter:
?accessKey=ANALYTICS_KEY
If you already have a (https://deep.bi/signin)[Deep.BI] account please visit the API Keys tab in Settings where DATASET_KEY is referenced as "Stream Key" and ANALYTICS_KEY is referenced as "Analytics API Personal Key". The API Keys tab is accessible only by admin users. If you have any questions or need help, please contact us at [email protected].
Get a list of dimensions:
curl "https://api.deep.bi/v1/analytics/stream/DATASET_KEY/dimensions?accessKey=ANALYTICS_KEY"
Query data using query parameter authorization:
curl "https://api.deep.bi/v1/analytics/stream/DATASET_KEY/query?accessKey=ANALYTICS_KEY" \
  -H "Content-Type: application/json" -d @query1.json
Query data using query header authorization:
curl "https://api.deep.bi/v1/analytics/stream/DATASET_KEY/query" \
  -H "Authorization: Bearer ANALYTICS_KEY" \
  -H "Content-Type: application/json" -d @query1.json
Query language
The query language is loosely based on Druid Native Queries. We are strongly recommending using the Deep.BI panel option "Query" that displays the query for a given widget on a selected dashboard.
To access this option you need to:
- Select a dashboard.
- Enter “Edit” mode. If no “Edit” mode is available for this dashboard, clone it first.
- In the upper part of the given gadget you’ll see the "Query" icon when the mouse cursor is hovering over the widget.
- Click the icon to reveal “Query Preview”.
- Press “Copy to Clipboard” to copy the query.
- Use your favorite console to access the data
Please note the result you receive contains not only the requested value, but also other metrics used in calculations. Please do not rely on this behavior in your app code. Always access results JSON using the defined dimension / metrics. Please also note that the command to receive data is formatted for Unix like systems and will not work well in Windows cmd.exe window, but you can still use it to get required keys and the query in JSON format.
Scoring API helper
Tracker option field
deep.options.scoring
Option preferences
Set scoring to request for scores after tracker initialization:
deep.options.scoring = {
    initialRequest: true
};
Set scoring preferences to request scores with custom id: (deepcookie if not specified)
deep.options.scoring = {
    defaultId: {
        name: "custom.field",
        value: "customValue"
    }
};
deep.options.scoring = {
    initialRequest: true,
    defaultId: {
        name: "custom.field",
        value: "customValue"
    }
};
Retreving scoring data from tracker
Scoring data is available in Promise from getScore() initialized tracker method:
deepTracker.getScore(params).then(data => {...});`
Method input:
{
"force": true|false,
"type": "level|profile|score",
"id":{
        name: "custom.field",
        value: "customValue"
    }
}
- force - force request to API, returns scoring data from tracker if not set
- type - scoring type, default
score - id - identifier params, default is
deepcookie, both fields required if specified
Examples:
Call:
deepTracker.getScore().then(score => console.log("access to score data", score));
Console output:
access to score data {propensity2subscribe: 0.000054, recency: 29, frequency: 7, rfv: 11, volume: 6}
Call for score:
deepTracker.getScore({type: "score"}).then(score => console.log("access to score data", score));
Console output:
access to score data {propensity2subscribe: 0.000054, recency: 29, frequency: 7, rfv: 11, volume: 6}
Call for level:
deepTracker.getScore({type: "level"}).then(score => console.log("access to score data", score));
Console output:
access to score data {propensity2subscribe: 1, recency: 2, frequency: 0, rfv: 1, volume: 0}
Call for profile:
deepTracker.getScore({type: "profile"}).then(score => console.log("access to score data", JSON.stringify(score)));
Console output:
access to score data {"rfv_score":11,"recency_score":29,"recency_level":2,"propensity2subscribe":0.000054,"volume_level":0,"device_model":"","session_timespent_active":109,"frequency_score":7,"rfv_segment":"Prospective","location_city":"Warsaw","frequency_level":0,"volume_score":6,"device_type":"Desktop","location_country":"Poland","rfv_level":1,"device_vendor":"","session_timespent_total":1715,"session_pv":3,"days_since_first_visit":7}
Call with custom id:
deepTracker.getScore({force: true, type: "profile", id:{name: "dga.cookie", value: "f0ac448b-7724-40a6-9126-bed157f248ac"}}).then(score => console.log("access to score data", JSON.stringify(score)));
Console output:
access to score data {"rfv_score":2,"recency_score":2,"recency_level":0,"propensity2subscribe":0,"volume_level":0,"paywall_score":0,"device_model":"","session_timespent_active":110,"frequency_score":3,"rfv_segment":"Won-back","location_city":"Cambridge","frequency_level":0,"volume_score":2,"device_type":"Desktop","location_country":"United States","rfv_level":0,"device_vendor":"","action_score":0,"session_timespent_total":567,"session_pv":2,"days_since_first_visit":44}
Call with force request to scoring API:
deepTracker.getScore({force: true, type: "profile"}).then(score => console.log("access to score data", JSON.stringify(score)));
Console output:
access to score data {"rfv_score":12,"recency_score":25,"recency_level":2,"propensity2subscribe":0.00004,"volume_level":0,"device_model":"","session_timespent_active":51,"frequency_score":10,"rfv_segment":"Prospective","location_city":"Warsaw","frequency_level":1,"volume_score":7,"device_type":"Desktop","testgroup":5,"location_country":"Poland","rfv_level":1,"device_vendor":"","session_timespent_total":965,"session_pv":2,"days_since_first_visit":15}
Release Notes
In this section you can find information about new and past releases of Deep.BI APIs.
December 2019
Deep Media Analytics script update:
| date | 2019-12-13 |
|---|---|
| version | 3.0.28 |
Tracking script changes: referrer value moved from 1st party cookie to localStorage to avoid overloading a cookie with huge social media referrers.
November 2019
Deep Media Analytics script update:
| date | 2019-10-24 |
|---|---|
| version | 3.0.26-27 |
Tracking script changes: source code refactoring and optimizations.
October 2019
Deep Media Analytics script update:
| date | 2019-10-24 |
|---|---|
| version | 3.0.25 |
Tracking script changes: globalVariableCollector added - collecting custom variables from global window for these which are creating their data objects (for example articleData) based on dynamic code and not only static templates (handled by dataCollector).
New tracker option globalVariablesDataCollector: true. Useful for anyone who wants to add global variables to our events without running deep({...}) and caring about when and how to implement it.
- Scoring API helper - wait for scoring request for 50ms or return localStorage value.
September 2019
Deep Media Analytics script update:
| date | 2019-09-09 |
|---|---|
| version | 3.0.24 |
Tracking script changes:
- Piano Events Queue, new tracker option
pianoEventsQueue: true.
August 2019
Deep Media Analytics script update:
| date | 2019-08-29 |
|---|---|
| version | 3.0.23 |
Tracking script changes:
- Piano Data Collector, new tracker option
pianoDataCollector: true. The collected data is stored inevent.pianoCollectedData.*dimension.
| date | 2019-08-21 |
|---|---|
| version | 3.0.21 |
Tracking script changes:
- Piano TinyPass injection template.
| date | 2019-08-05 |
|---|---|
| version | 3.0.19 |
Tracking script changes:
- Initial release of Deep.BI Scoring API helper.
July 2019
Deep Media Analytics script update:
| date | 2019-07-24 |
|---|---|
| version | 3.0.18 |
Tracking script changes:
- New dimension
user.attention.secondsSpent- total number of seconds spent on page. Useful for assessing current time spent on a given page.
| date | 2019-07-08 |
|---|---|
| version | 3.0.17 |
Tracking script changes:
- New option
deep.options.forceDeepcookie = true;, forces rewrite of the DeepCookie with ID recorded in 1st party cookie. Useful when changing custom Deep.BI endpoints - makes it possible to retain cookie ids from the previous endpoint.
June 2019
Deep Media Analytics script update:
| date | 2019-06-28 |
|---|---|
| version | 3.0.16 |
Tracking script changes:
- Fixed inconsistent Do Not Track recognition causing overzealous blocking of cookies.
| date | 2019-06-25 |
|---|---|
| version | 3.0.15 |
Tracking script changes:
- Fixed IE11 support.
- Enhanced and configurable pixel measurement.
| date | 2019-06-11 |
|---|---|
| version | 3.0.14 |
Tracking script changes:
deep.options.identifyByoption added to allow for custom data partitioning. The default value isuser.id.deepcookieand it can be now substituted with any specific unique user ID uploaded to Deep.BI.- fixed
session.referrerto correctly keep referrer value per session.
May 2019
Deep Media Analytics script update:
| date | 2019-05-20 |
|---|---|
| version | 3.0.13 |
Tracking script changes:
deepTracker.getScore()method using millisecond fast Scoring API to assess user scoring in real time.
April 2019
Deep Media Analytics script update:
| date | 2019-04-08 |
|---|---|
| version | 3.0.8 |
Tracking script changes:
- Fix for inconsistent DeepCookie management in sessions
March 2019
Deep Media Analytics script update:
| date | 2019-03-05 |
|---|---|
| version | 3.0.7 |
Tracking script changes:
- Integration manager with the first general integration with Piano
January 2019
Deep Media Analytics script update:
| date | 2019-01-12 |
|---|---|
| version | 3.0.6.1 |
Tracking script changes:
- New media related events:
media.event.video-playingandmedia.event.audio-playing - DeepDataCollector - a flexible, dynamic data collection method for parent pages with
<iframe>elements, useful for embedded media players with no access to globaldeep();function for sending additional media metadata.
December 2018
Deep Media Analytics script update:
| date | 2018-12-16 |
|---|---|
| version | 3.0.6 |
Tracking script changes:
- Added option for ignoring Do Not Track setting of the browser:
deep.options.dntignore = true; - New dimension
trackeroptions.dntignoreindicates the script settings - New dimension
device.browserua.dntindicates current user settings of Do Not Track - Integration with AdOcean ad serving solution.
Deep Media Analytics script update:
| date | 2018-12-05 |
|---|---|
| version | 3.0.2 |
Tracking script changes:
- New major version tracker address (
/v3/) - CORS - support and mitigation of the default blocking policies.
November 2018
Deep Media Analytics script update:
| date | 2018-11-29 |
|---|---|
| version | 3.0.1 |
Tracking script changes:
- Script has been refactored and optimised.
- Added detection of dynamically changing audio/video materials. Check for a new material is performed every 2s.
July 2018
Deep Media Analytics script update:
| date | 2018-07-06 |
|---|---|
| version | 2.2.6 |
Tracking script changes:
- Added option to inject static data to be sent with all subsequent events.
Use the following statement
deep.options.inject = {json}. The data is available in Analytics API and Dashboards asmeta.data.inject - Non-JS (Pixel) measurement added. To register Unique User and Page View GET
http(s)://api.deep.bi/v1/p/STREAM_KEY/p.gif?accessKey=INGESTION_KEY
May 2018
Deep Media Analytics script update:
| date | 2018-05-30 |
|---|---|
| version | 2.2.5 |
Tracking script changes:
- GDPR compliant consent options added
- Do not send duplicate elements ('open' event)
- Bugfixes
February 2018
Deep Media Analytics script update:
| date | 2018-02-08 |
|---|---|
| version | 2.1.12 |
Tracking script changes:
- Stop sending events when the element is hidden
- Cookies visible across all sub-domains
- Bugfixes
January 2018
Deep Media Analytics script update:
| date | 2018-01-12 |
|---|---|
| version | 2.1.0 |
Tracking script changes:
- New features: clickability, viewability, scrolldepth
- New tools: marks, timer, scroll event handler, deep elements, deep elements transformation
- Adding elements dynamically (after DMA initialization)
- New transitions and merge attributes
- Check if 'explode' transition exists
- Change name click.js -> clickability.js
- ScrollDepth test file
- Add visibly.js Visibly lets you easily establish whether a page currently being viewed in the browser is visible to the user or has been hidden by them switching to another tab
- Save eventSeq as a cookie parameter
November 2017
Deep Media Analytics script update:
| date | 2017-11-13 |
|---|---|
| version | 1.2.25 |
Tracking script changes:
- Added script for session tracking
- Added support for older version of 'cookie_matching' option (boolean flag)
- Cookie_matching flag as a deep.options property
- Added cookie matching to track-sizzle concat list
- Added check if tracker's forEachStream function exists for backward compatibility
September 2017
Deep Media Analytics script update:
| date | 2017-09-08 |
|---|---|
| version | 1.2.24 |
Tracking script changes:
- Use streamKey for tracker selection and option cookie_matching
- Cookiematching: updated tracking script to use script tag injection instead of XMLHttpRequest
- Changed 'deeptrack' var name to 'deep'
- UID retrieval from SAS foundations
May 2017
Deep Media Analytics script update:
| date | 2017-05-09 |
|---|---|
| version | 1.2.22 |
Tracking script changes:
- Page-ping timestamp set to the moment it's being sent
- Add 'promo' to query params white-list
- Add dmascript version and releasedate dimensions
November 2016
| date | 2017-11-21 |
|---|---|
| version | 1.2.18 |
Enrichment API update.
Since November, users can get 200+ new data dimensions through 3rd party data enrichers available on the Deep.BI platform in four categories:
- Location
- Weather (weather station info)
- Internet provider / organization
- Device: hardware platform, software platfrom, browser.
To learn more please refer to: docs.deep.bi/#data-attributes
September 2016
Deep Media Analytics script update:
| date | 2016-09-30 |
|---|---|
| version | 1.2.16 |
Tracking script changes:
- Added a validation method to the tracking script
- Added referrer.domain to referrer attributes
- Improved cookie collection
- Improved tracking of URL parameters
May 2016
Deep Media Analytics script update:
| date | 2016-05-27 |
|---|---|
| version | 1.2.7 |
Media Events
The Deep Media Analytics script now supports automatic collection of media events for HTML5 objects (audio, video). To see the list of tracked events and their attributes read more about media events here: media events documentation.
Performance Events
The Deep Media Analytics script now enables you to track the load time of page resources. You can either track all page resources or only specified types of resources. To read more about performance events see: performance events documentation.
Error Events
The Deep Media Analytics script allows you to track page errors for your service, which includes javascript or AJAX http errors. To read more about error events see: error events documentation.
April 2016
Deep Media Analytics script update:
| date | 2016-04-18 |
|---|---|
| version | 1.2.1 |
We are pleased to introduce you to a new version of the Deep Media Analytics tracking script. The new snippet changes how the data is collected and is also a step towards long term support of key features we plan to introduce to clients in the future.
DMA snippet changes:
- New structure for automatically collected events
- New dimensions for referring date within tracked events
- New authorization method
- Optimization improvements
This new event structure will partially affect how you query your data through Deep Explorer. Changes within dimensions between the new and legacy scripts are listed in the tables below.
Event dimensions
| New script | Legacy script |
|---|---|
| event.type | eventype |
| event.pingseq | pingseq |
| event.timestamp | n/a |
| event.localtime.year | n/a |
| event.localtime.month | n/a |
| event.localtime.monthno | n/a |
| event.localtime.hour | n/a |
| event.localtime.minute | n/a |
| event.localtime.weekday | n/a |
| event.localtime.weekdayno | n/a |
| event.localtime.utcoffset | n/a |
Page dimensions
| New script | Legacy script |
|---|---|
| page.domain | domain |
| page.title | title |
| page.protocol | page.protocol |
| page.host | page.host |
| page.hostname | page.hostname |
| page.port | page.port |
| page.path | page.path |
| page.href | page.href |
| page.search | page.search |
| page.query.[parameter] | n/a |
| page.hash | page.hash |
| page.loadtime | pageloadTime |
Referrer dimensions
| New script | Legacy script |
|---|---|
| referrer.protocol | referrer.protocol |
| referrer.host | referrer.host |
| referrer.hostname | referrer.hostname |
| referrer.port | referrer.port |
| referrer.path | referrer.path |
| referrer.href | referrer.href |
| referrer.search | referrer.search |
| referrer.query.[parameter] | n/a |
| referrer.hash | referrer.hash |
Attention dimensions
| New script | Legacy script |
|---|---|
| user.attention.active | attention.active |
| user.attention.idle | attention.idle |
| user.attention.total | attention.total |
Device dimensions
| New script | Legacy script |
|---|---|
| user.device.screen.width | screen.width |
| user.device.screen.height | screen.height |
| user.device.screen.availwidth | screen.availWidth |
| user.device.screen.availheight | screen.availHeight |
| user.device.screen.orientation | screen.orientation |
| user.device.agent | agent |
User ID dimensions
| New script | Legacy script |
|---|---|
| user.id.deepcookie | cookie |
| user.id.ip | ip |
| user.id.session | n/a |